How to Refer to a Cell in a Previous Row in Airtable
If you’ve switched from Excel or Google Sheets to Airtable, you probably already know how flexible and powerful it is. You can link records, create forms, and even automate parts of your workflow.
But there’s one thing that can be tricky. If you want to use a number from the row before, it doesn’t work the same way as it does in a spreadsheet.
Let’s say you want to keep a running balance, where each new row adds to the one before it. Or maybe you want to see how much time has passed since the last transaction. These things are easy in spreadsheets using formulas, but you can’t do it the same way in Airtable.

So why can’t you use the previous record in an Airtable formula?
Even though Airtable looks like a spreadsheet, it is really a database. In a database, each row (called a record) is separate. Unlike Excel or Google Sheets, you can’t write a formula to add numbers from the row above. Airtable formulas only work with data in the same row.
That means if you want to use the record before, you will need to do a few extra steps. I will show you how with a simple example.
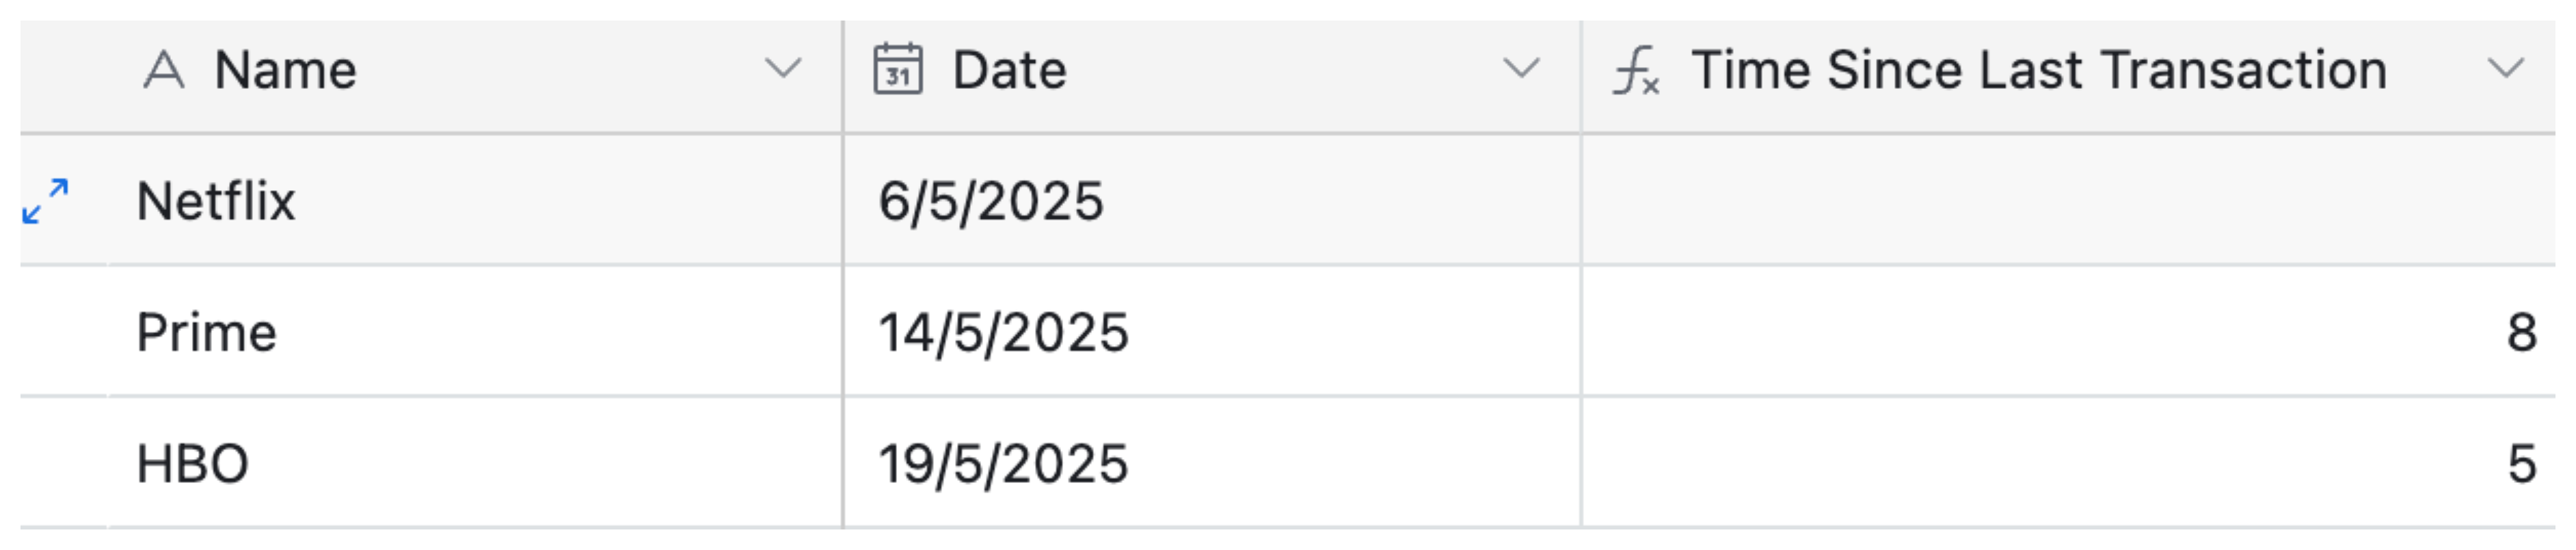
Imagine you are keeping track of expenses. Each record in your table is a transaction, and it has two parts. One is the Date, which shows when the transaction happened. The other is Time Since Last Transaction, which shows how much time has passed since the previous one.
The first transaction happened on May 6. There’s no previous transaction, so the time is blank. The second transaction happened on May 14. That’s 8 days after the first one. The third transaction was on May 19, so 5 days after the second.
In Excel, this is easy, you just subtract dates in two rows. But in Airtable, each record can’t automatically reference the one above it. So you’ll need to set up a way for each transaction to "know" which one came before.
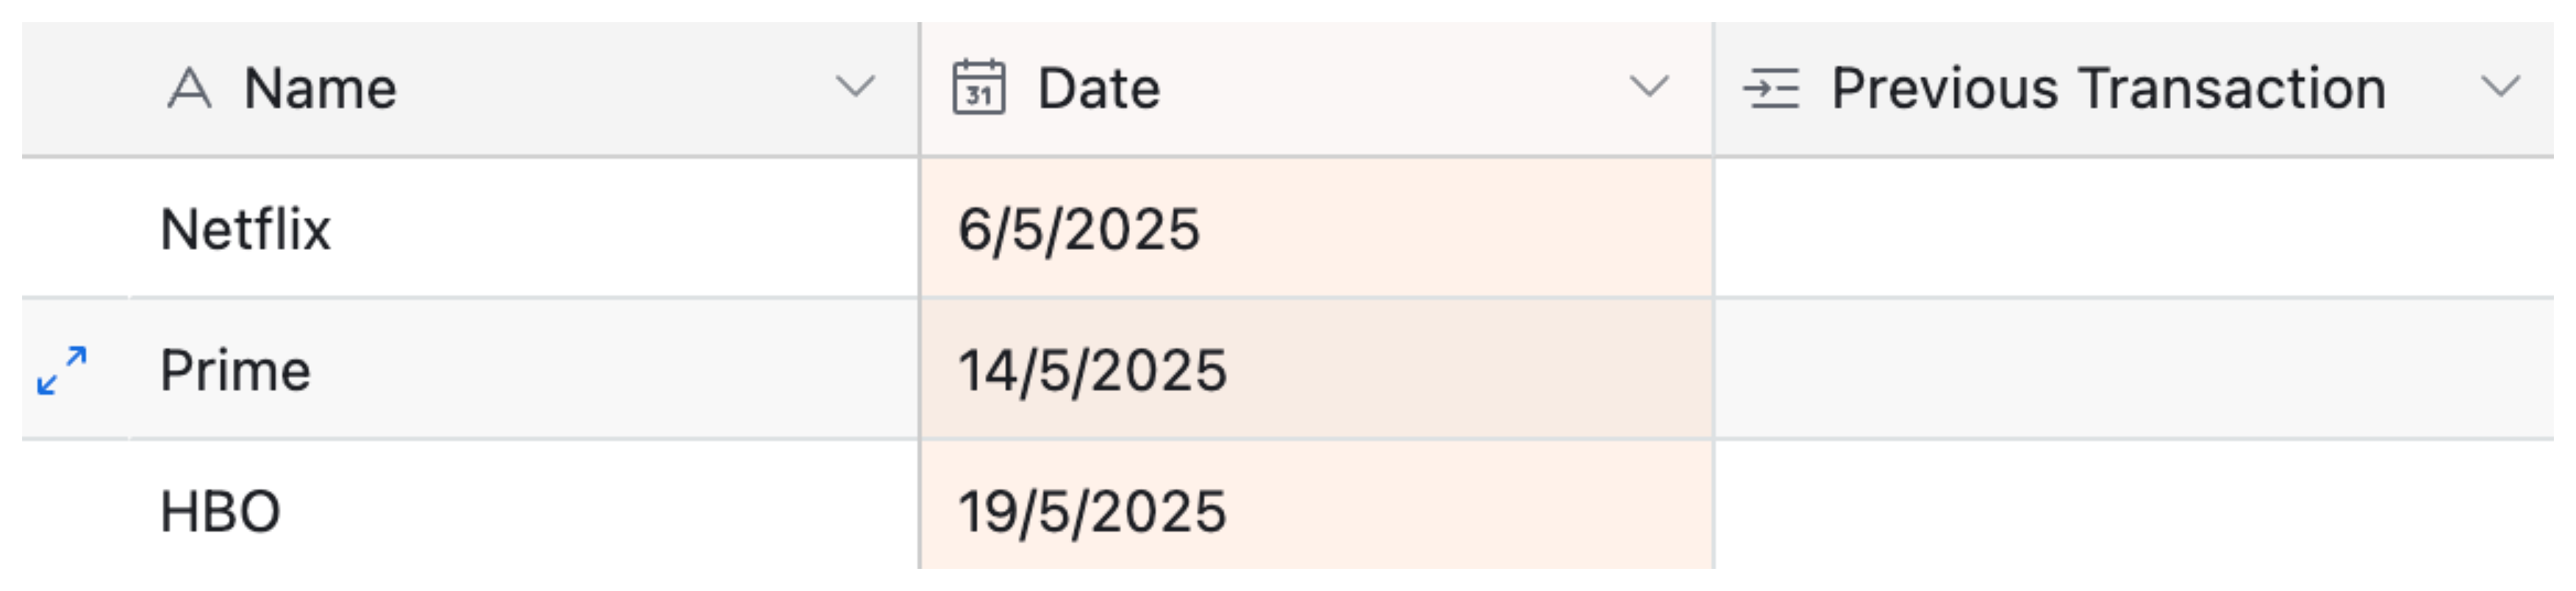
1. Create a “Previous Transaction” field
Go to your table and create a new field called Previous Transaction. Set this field as a linked record and link it to the same table, which is called a self-link.
This will allow each record to connect to the one that came before it.

2. Choose your order
Decide how you want to order transactions, usually by a Date field. Sort the table from oldest to newest.
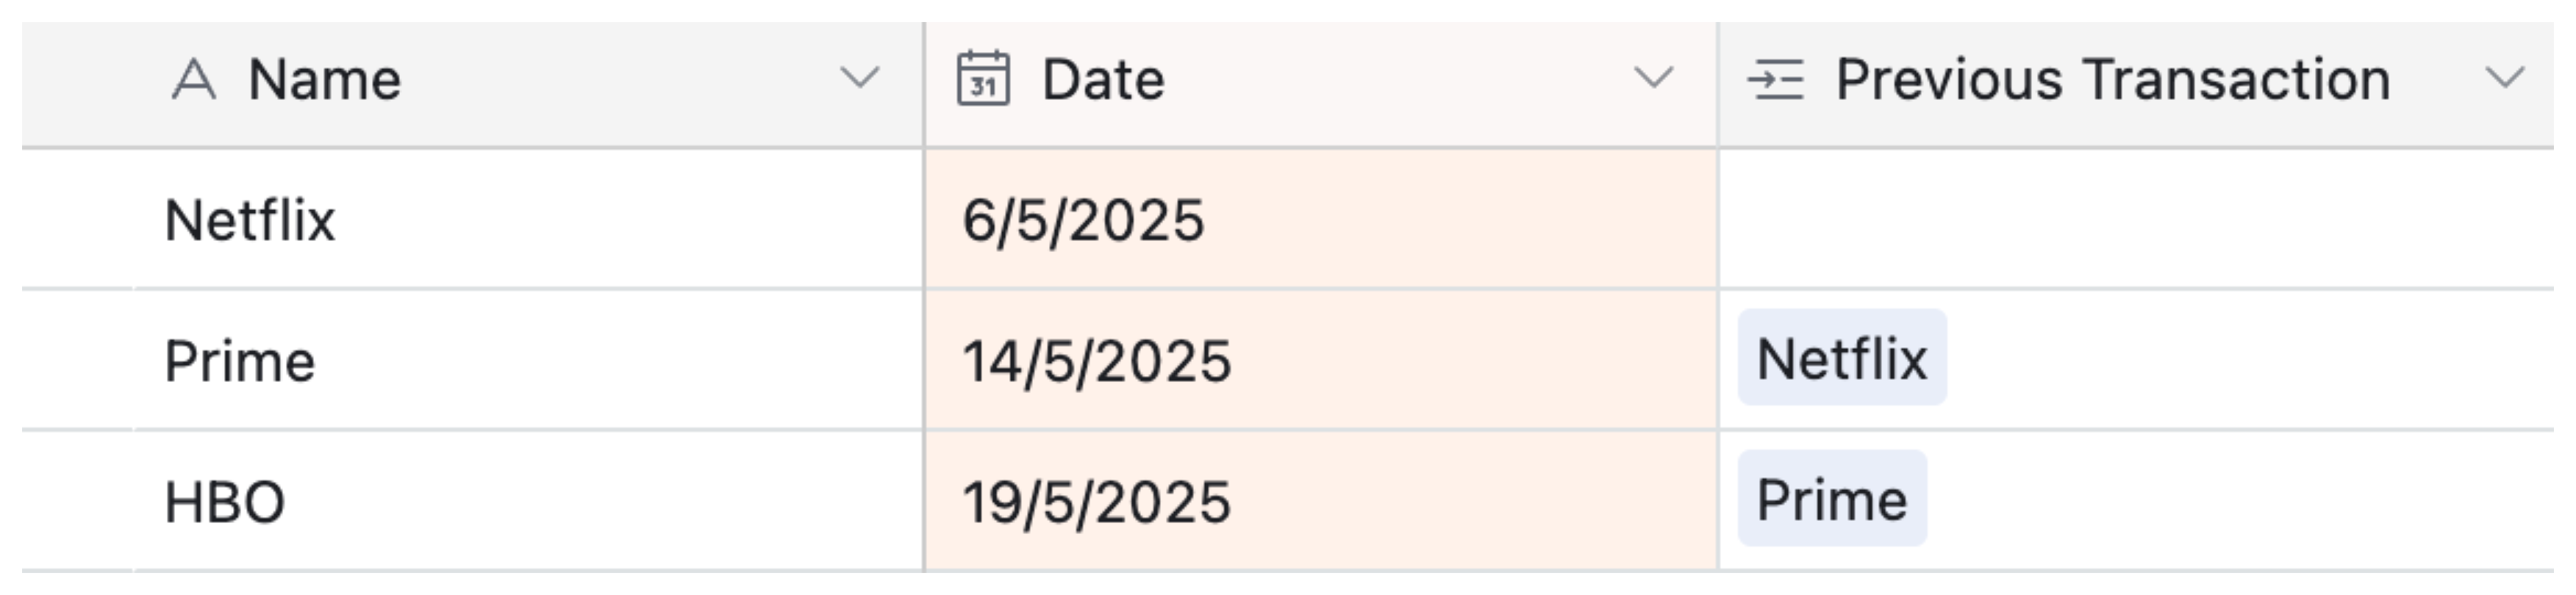
3. Link each record manually
Now go down the table and link each record to the one above it using the Previous Transaction field.
For the first record, leave it empty, since there’s no transaction before that. The second record links to the first. The third links to the second. And so on.
4. Create a “Previous Date” lookup field
Add a lookup field called Previous Date. Set it to pull the Date from the linked Previous Transaction.
Now each record shows the date of the previous transaction.

5. Create the “Time Since Last Transaction” formula
Add a formula field called Time Since Last Transaction.
Use this formula IF({Previous Date}, DATETIME_DIFF(Date, {Previous Date}, 'days'), BLANK())
This will calculate how many days passed since the previous record. If it’s the first record, it stays blank.

What if you don’t want to link manually?
Instead of linking each record by hand, you can set up an automation in Airtable. This will find the most recent record (based on date) and link the new one to it. Here's how to do it:
1. Create a View for Previous Records
Create a new view in your table and name it something like Automation View.
Set the filter condition to: Previous Transaction is not empty.
Sort the view by Date (descending) or by the Created time field, depending on how you're ordering records.
This view will only show records that already have a Previous Transaction assigned and will exclude the new record until it’s linked. This prevents the automation from linking a record to itself.
2. Set the trigger
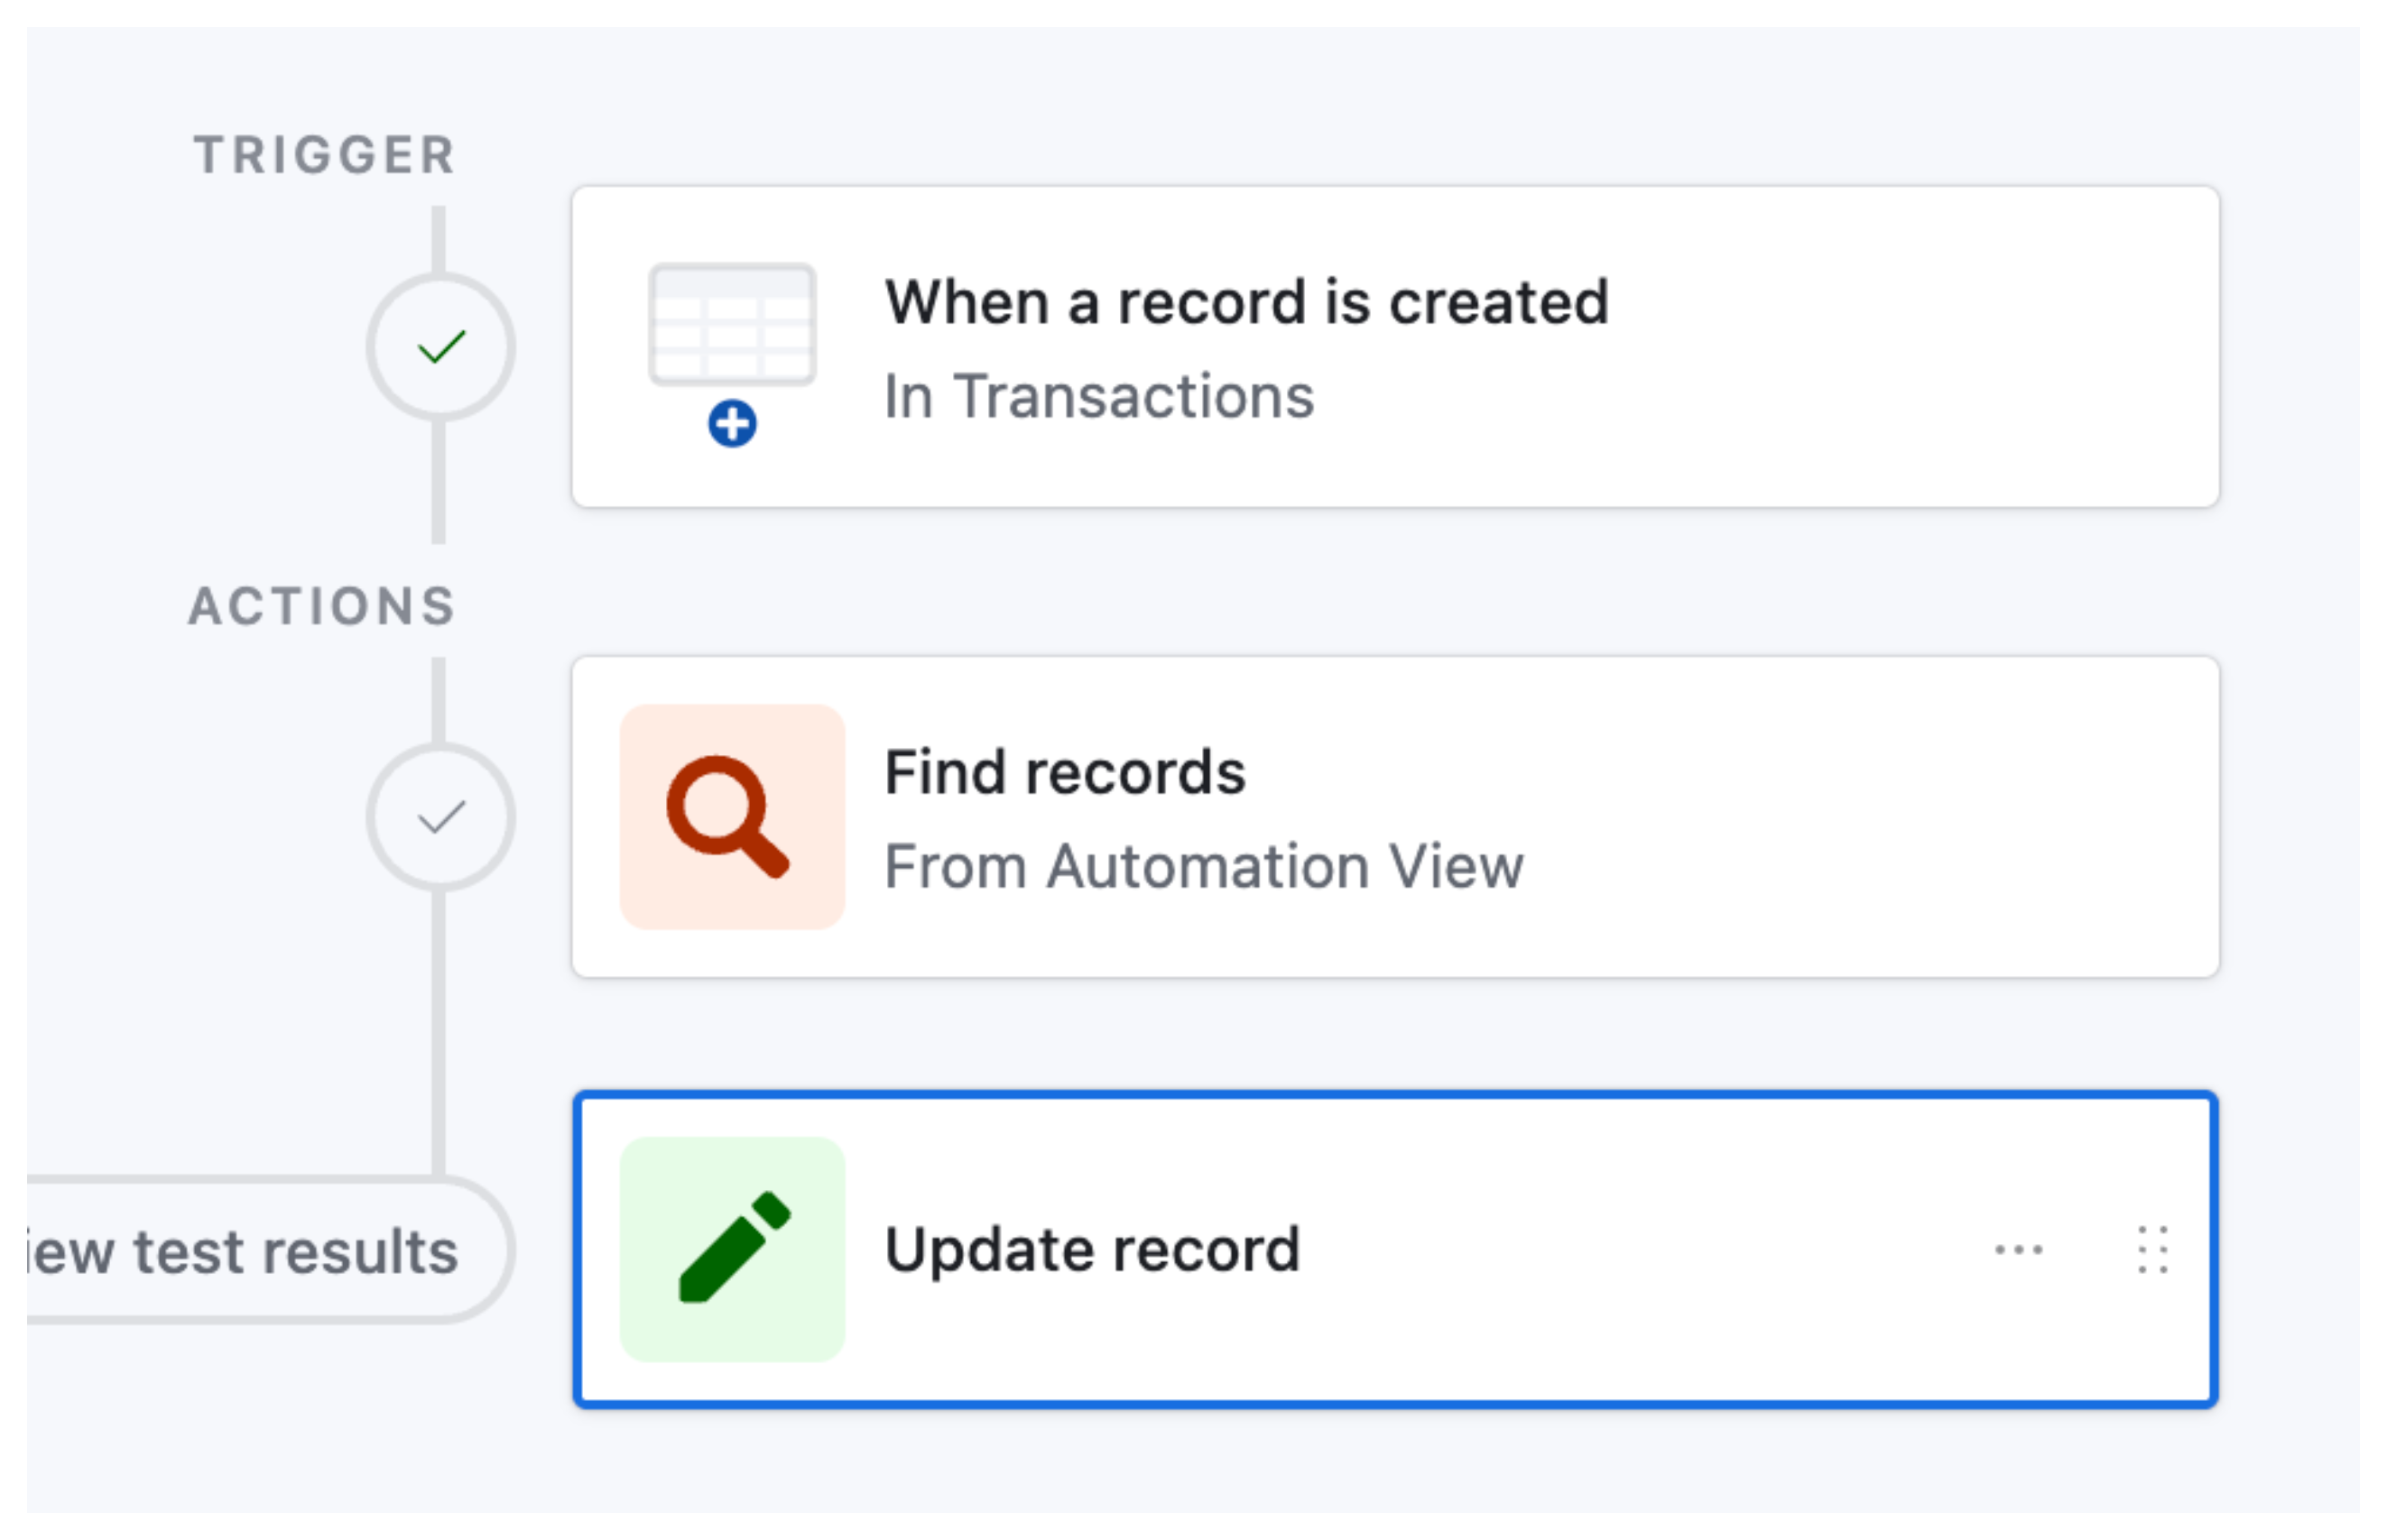
Go to the Automations panel and click Create new automation.
Choose When a record is created as the trigger. Then select your main table, for example, the Transactions table. This makes sure the automation runs whenever a new transaction is added.
3. Add a "Find records" action
For the action, choose Find records. In the settings, select the same table (Transactions) and choose the Automation View you created earlier.
This view should only show records where the "Previous Transaction" field is not empty. Then limit the results to 1 record so only the most recent one is selected.
4. Add an "Update record" action
Add another action and select Update record.
For the record ID, use the record from the trigger step, this is the newly created record.
In the Previous Transaction field, insert the record that was returned in the Find records step. This links the new transaction to the one that came before it.
How It Works
When a new transaction is added, it doesn’t appear in the Automation View yet because its Previous Transaction field is still empty.
The automation then searches for the most recent record that does appear in that view, meaning it already has a Previous Transaction linked. It selects that record and links it as the Previous Transaction for the new one.
Once the new record is updated with this link, it now qualifies to enter the view and becomes available to serve as the “previous” record for the next transaction that gets added.
And that’s it. You now have a working setup for referring to a cell in a previous row in Airtable.
For more on working with linked records and lookups to pull values across your data, see How to Automatically Link Records in Airtable. If you are building running totals or cumulative calculations, see How to Create Running Totals in Airtable.