How to Back Up Your Airtable Bases (And Restore Them Safely)
Most people do not think about backing up their Airtable base until something goes wrong. A bulk delete that went further than intended. An automation that ran with the wrong filter and corrupted hundreds of records. A field type change that broke formulas across the base. A team member who deleted a table thinking it was unused.
By the time you realise the data is gone or wrong, you need a backup that already exists.
Airtable has a built-in backup system that most users do not know about or do not use properly. It is not perfect, and it has some important limitations that are worth understanding before you depend on it. This article covers how it works, how to restore from it, and how to fill the gaps it leaves.
What You Are Actually Trying to Back Up
Before getting into the methods, it helps to be specific about what a backup needs to cover. An Airtable base is not just data. A complete backup includes:
-
Records and field values across all tables
-
Field types, configurations, and descriptions
-
Linked record relationships between tables
-
Formulas
-
Views with their filters, groupings, and sort settings
-
Automations and their scripts
-
Interfaces and their layouts
-
Extensions and their configurations
CSV exports only capture the first item on that list: raw records and their values. Everything else is lost. This is why CSV-only backup strategies are not sufficient for anything beyond simple data archiving.
Method 1: Airtable Snapshots (Built-In)
Snapshots are Airtable's native backup mechanism. A snapshot captures your entire base at a single point in time, including tables, field configurations, automations, scripts, interfaces, and extensions. It is the only method that captures all of those things in one place.
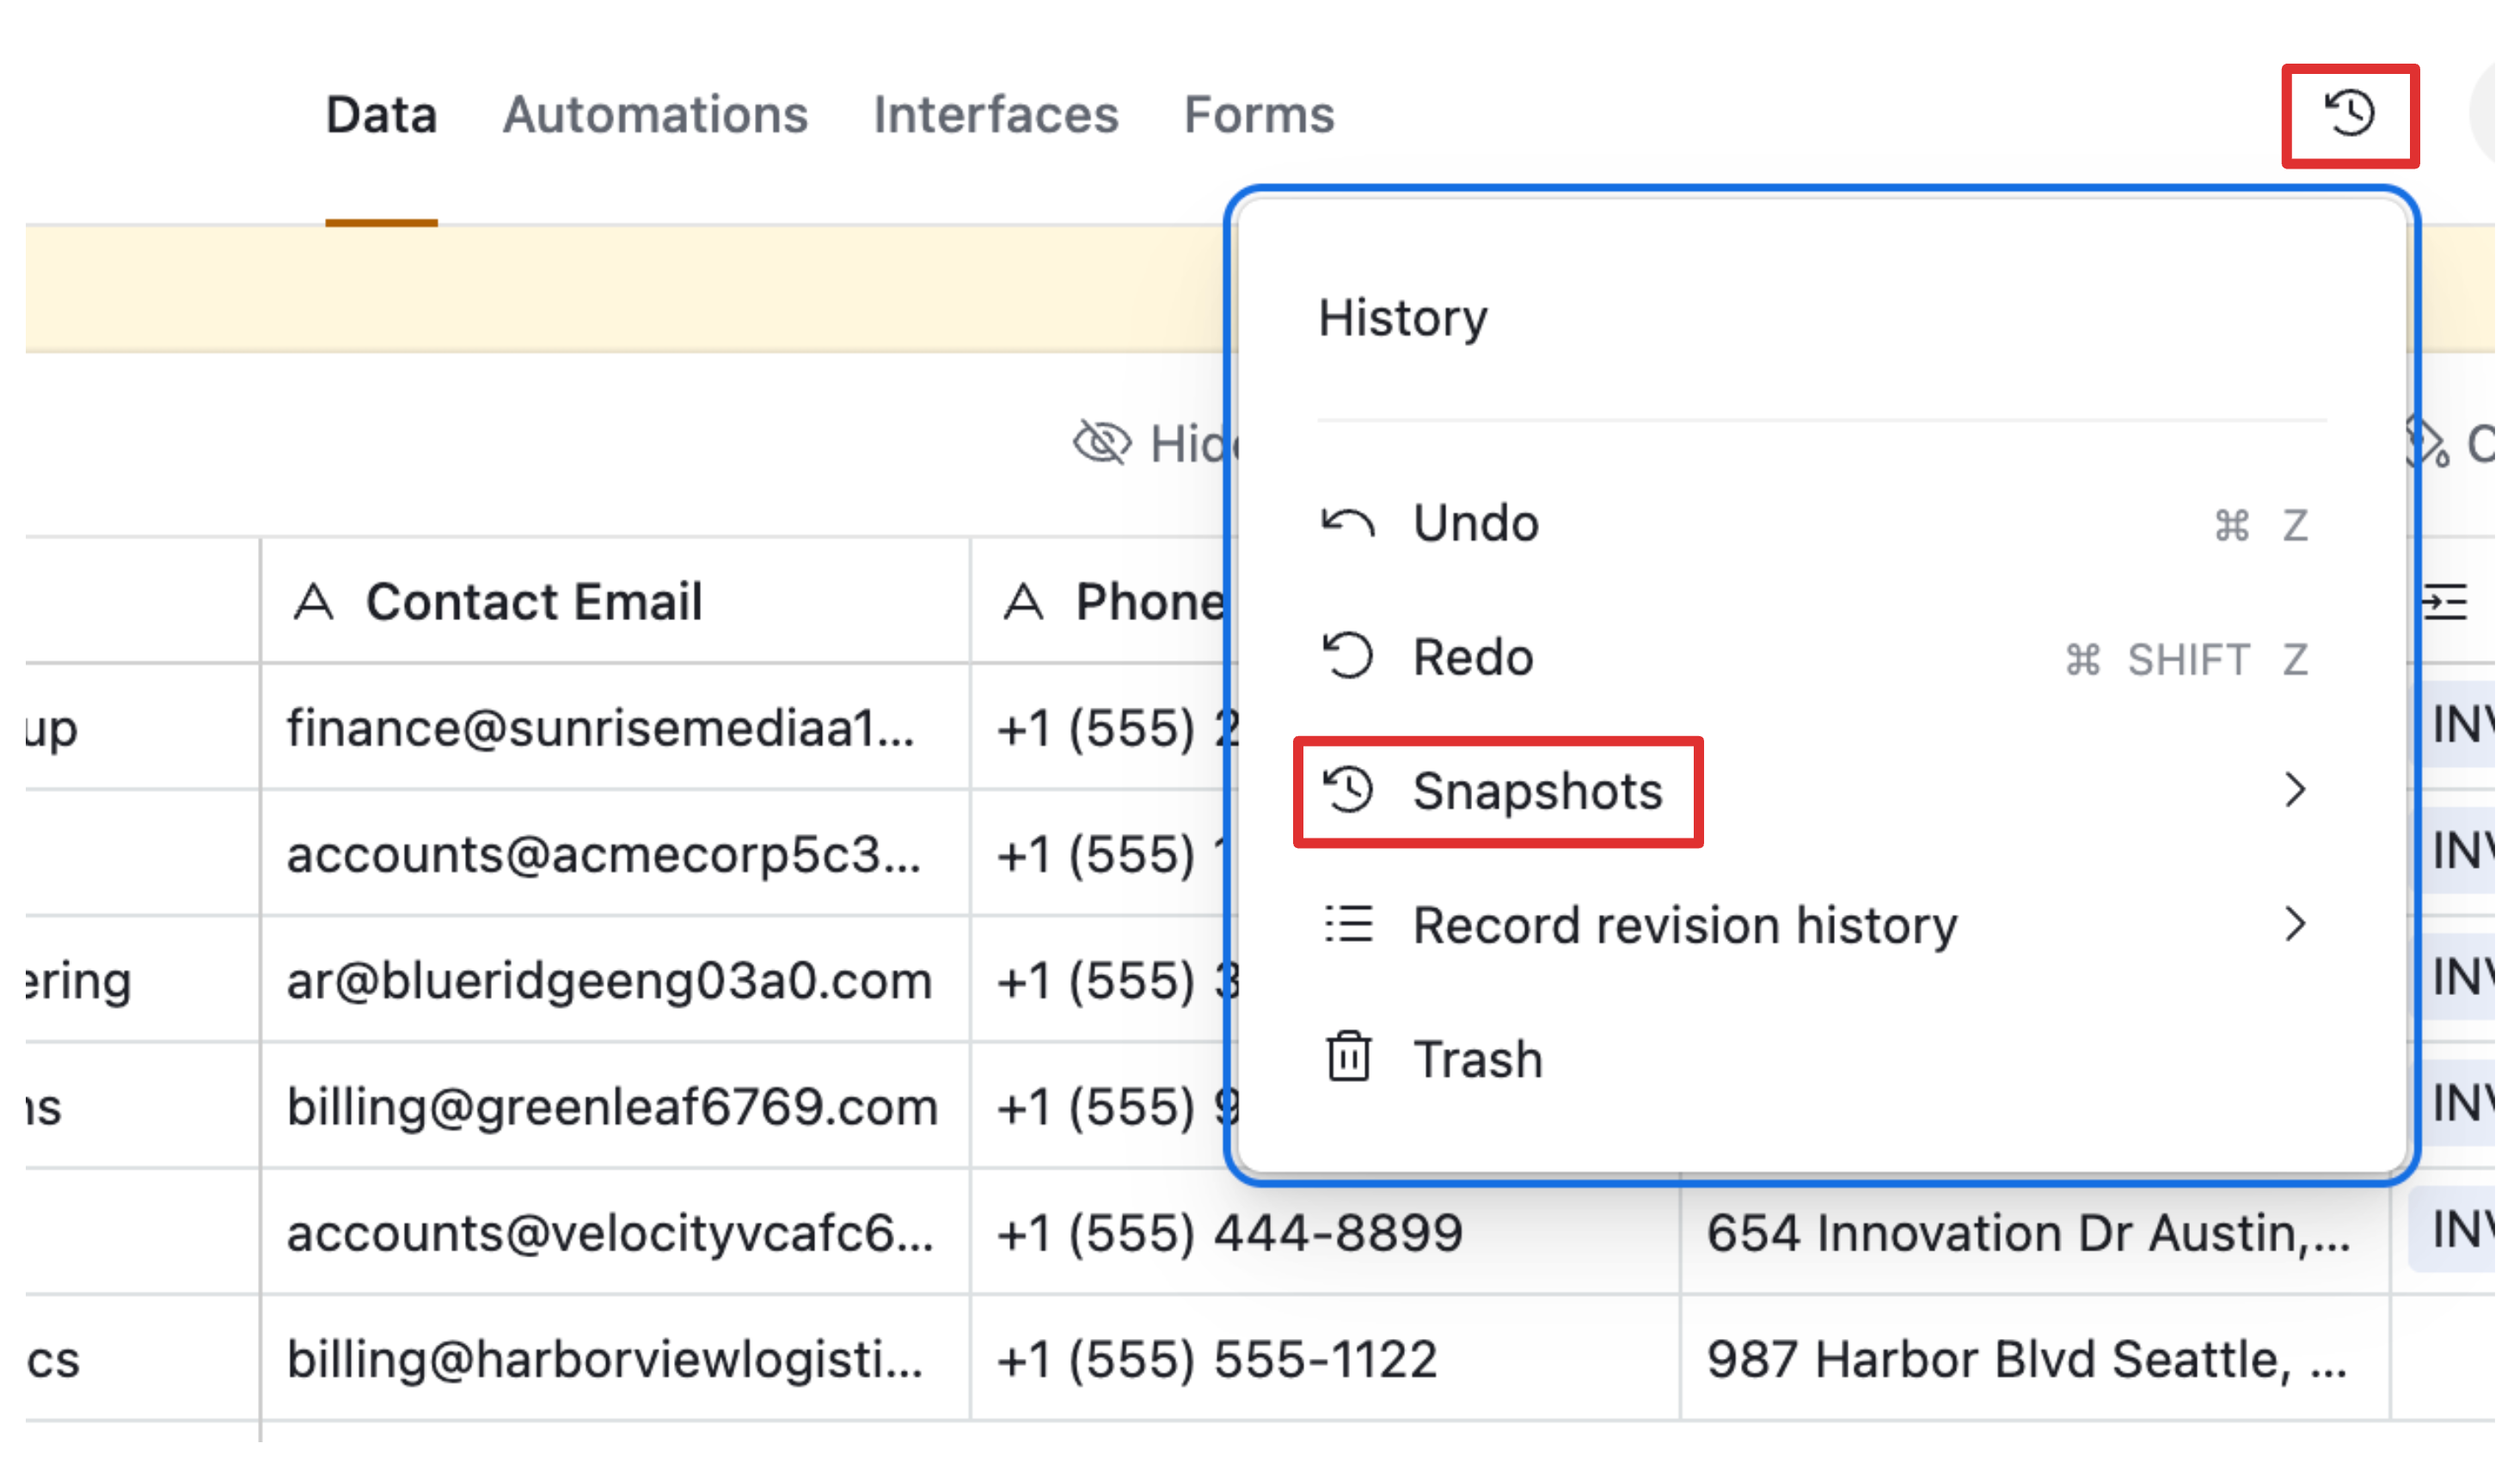
How to take a manual snapshot
-
Open the base you want to back up
-
Click the clock icon in the top-right toolbar
-
Select Snapshots from the panel
-
Click Take snapshot now
Airtable will confirm when the snapshot is complete. It usually takes a few seconds for small bases and up to a minute or two for very large ones.
You can add a name or note to each snapshot so you remember what state it represents. Something like "Before bulk field rename" or "Pre-automation update" is more useful than the default timestamp when you are trying to find the right restore point quickly.
Note that there is a cooldown between manual snapshots — typically a few hours. This means you cannot take snapshots back to back, so take yours before you start a risky operation rather than trying to take one mid-way through.
How often Airtable takes automatic snapshots
Airtable takes automatic snapshots in the background based on the number of user actions in the base, not on a fixed daily schedule. A heavily used base will accumulate snapshots more frequently than one that is rarely touched. You can get a sense of your typical snapshot frequency by looking at the intervals in your snapshot list after a few days of normal usage.
Do not rely on automatic snapshots alone. Take manual snapshots before any significant operation.
How to restore from a snapshot
-
Click the clock icon in the toolbar
-
Select Snapshots
-
Browse the list and find the snapshot you want to restore from
-
Click Restore snapshot
Airtable does not overwrite your current base. It creates a new duplicate base in your workspace that reflects the state of the base at the time the snapshot was taken. Your live base remains untouched.
From there, you have two options depending on what went wrong:
If you need to recover specific records or data: Open the snapshot base, find what you need, and manually copy it back into your live base. This works well when only a small amount of data needs to be recovered.
If the damage is widespread and you need to restore the whole base: You will need to decide whether to rebuild from the snapshot copy or to update your integrations to point at the new base. See the limitation below about record IDs before making that call.
What changes and what is preserved on restore
When Airtable restores a snapshot, it creates a new base. Most IDs are preserved: record IDs, view IDs, table IDs, and interface page IDs all remain the same. The one thing that changes is the base ID (also called the app ID), since a new base is created.
This means external integrations that reference the base by its app ID — webhooks configured with the base URL, API calls that hardcode the base ID, third-party tool connections — will need to be updated to point at the new base. Record-level references and automations inside the base itself should continue working as normal since record IDs are intact.
There is one more thing worth knowing: restored bases do not include revision history. The records and their current values are there, and record comments are preserved, but you will not be able to see the edit history of individual fields in the restored copy.
For bases with minimal external integrations, switching to a restored base is relatively painless. For heavily connected production bases, updating the app ID references is still much less work than reconstructing lost data manually.
Snapshot retention by plan
Snapshots are available on all Airtable plans. The difference is how far back your history goes:
-
Free plan: 2 weeks of snapshot history
-
Team plan: 1 year of snapshot history
-
Business plan: 2 years of snapshot history
-
Enterprise plan: 3 years of snapshot history
You need Editor or Creator permissions on the base to take a manual snapshot. To restore a snapshot, you need Creator permissions in the workspace where the restored base will be created.
If your use case requires more than two weeks of history, you need to be on a paid plan. Manual snapshots you take yourself count within your plan's retention window.
Method 2: External Data Backups
Snapshots are excellent for structural recovery (automations, interfaces, field configurations) but they stay inside Airtable. If you want your data stored somewhere independent of Airtable, you need an external backup.
CSV export (manual)
The simplest external backup is a CSV export. For each table you want to back up:
- Click the ... menu next to the table name
- Select Download CSV
This gives you a flat file of your records at that moment. The limitation is that it is entirely manual, captures no structure beyond basic data, and requires you to remember to do it regularly. For most use cases, it is a useful supplement but not a complete strategy on its own.
Automated external backup tools
Tools like On2Air Backups and ProBackup connect to your Airtable base and run backups on a schedule without you having to remember. They store your data outside Airtable in formats like Excel or Google Sheets and keep a version history so you can go back to any point in time.
These are worth considering if:
-
Your base contains data you genuinely cannot afford to lose
-
You need more granular backup history than Airtable's automatic snapshots provide
-
You want your data accessible outside Airtable independently of your account status
Using Make to export on a schedule
If you are already using an automation tool like Make, you can build a simple scheduled workflow that pulls records from your Airtable base into a Google Sheet or another destination at regular intervals.
This approach gives you full control over frequency and destination. A nightly export into a dated Google Sheet tab, for example, gives you a rolling 30-day history of your data that is completely independent of Airtable. The tradeoff is that it only captures data, not structure.
Choosing the Right Approach
| Snapshots | CSV Export | On2Air / ProBackup | Make | |
|---|---|---|---|---|
| Captures automations and interfaces | Yes | No | No | No |
| Captures field configurations | Yes | No | No | No |
| Captures records and data | Yes | Yes | Yes | Yes |
| Runs automatically | Partially | No | Yes | Yes |
| Data stored outside Airtable | No | Yes | Yes | Yes |
| Free to use | Yes (limited) | Yes | No | Partially |
For most bases, the right approach is to combine snapshots with one external option. Snapshots give you the ability to restore structure if something goes wrong. An external backup gives you an independent copy of the data you can access even if your Airtable account has an issue.
At a minimum: take a manual snapshot before any significant change to your base, and export a CSV of your most critical tables on a regular schedule.
For bases where data integrity is critical, add an automated external backup tool so you are not depending on remembering to do it manually.
Making Backups a Habit
The most effective backup strategy is one that runs without you having to think about it. A few practical habits that help:
Before any bulk operation: Take a manual snapshot before you run a bulk delete, a large import, or an automation that modifies many records. It takes 30 seconds and gives you an immediate restore point.
Before structural changes: Any time you are changing field types, renaming fields that are referenced in formulas, or restructuring tables, take a snapshot first.
On a regular schedule: If your base changes daily, a weekly manual snapshot in addition to whatever Airtable takes automatically gives you a reasonable safety net.
For more detail on recovering individual deleted records using the trash and snapshot system, see How to Restore Deleted Records in Airtable.
If you want to test changes to your base structure without touching your live data at all, see How to Safely Make Changes in Airtable Without Breaking Production, which covers Airtable's sandbox mode.