How to Bulk Select and Assign Inventory Items in Airtable
If you are managing any kind of inventory in Airtable, whether it is office supplies, tools, equipment, raw materials, finished products, or anything else, you will likely face the need to assign several of these items to something.
That could be a purchase order, a task, a project, a material request, or any other kind of record that requires pulling in multiple inventory items at once.
The way most people handle this in Airtable is by going into the individual request or order record and manually linking items one by one.
You click into the linked inventory field, hit the plus button, search for an item, add it, then repeat that process again and again until everything is selected.
This might work fine if you are only adding a few items, but once you start dealing with tens or hundreds of line items, it becomes painfully slow and tedious.
Ideally, you want a much easier workflow. You want to see your full inventory list, select the items you need, and with a single click, assign them all to the request.
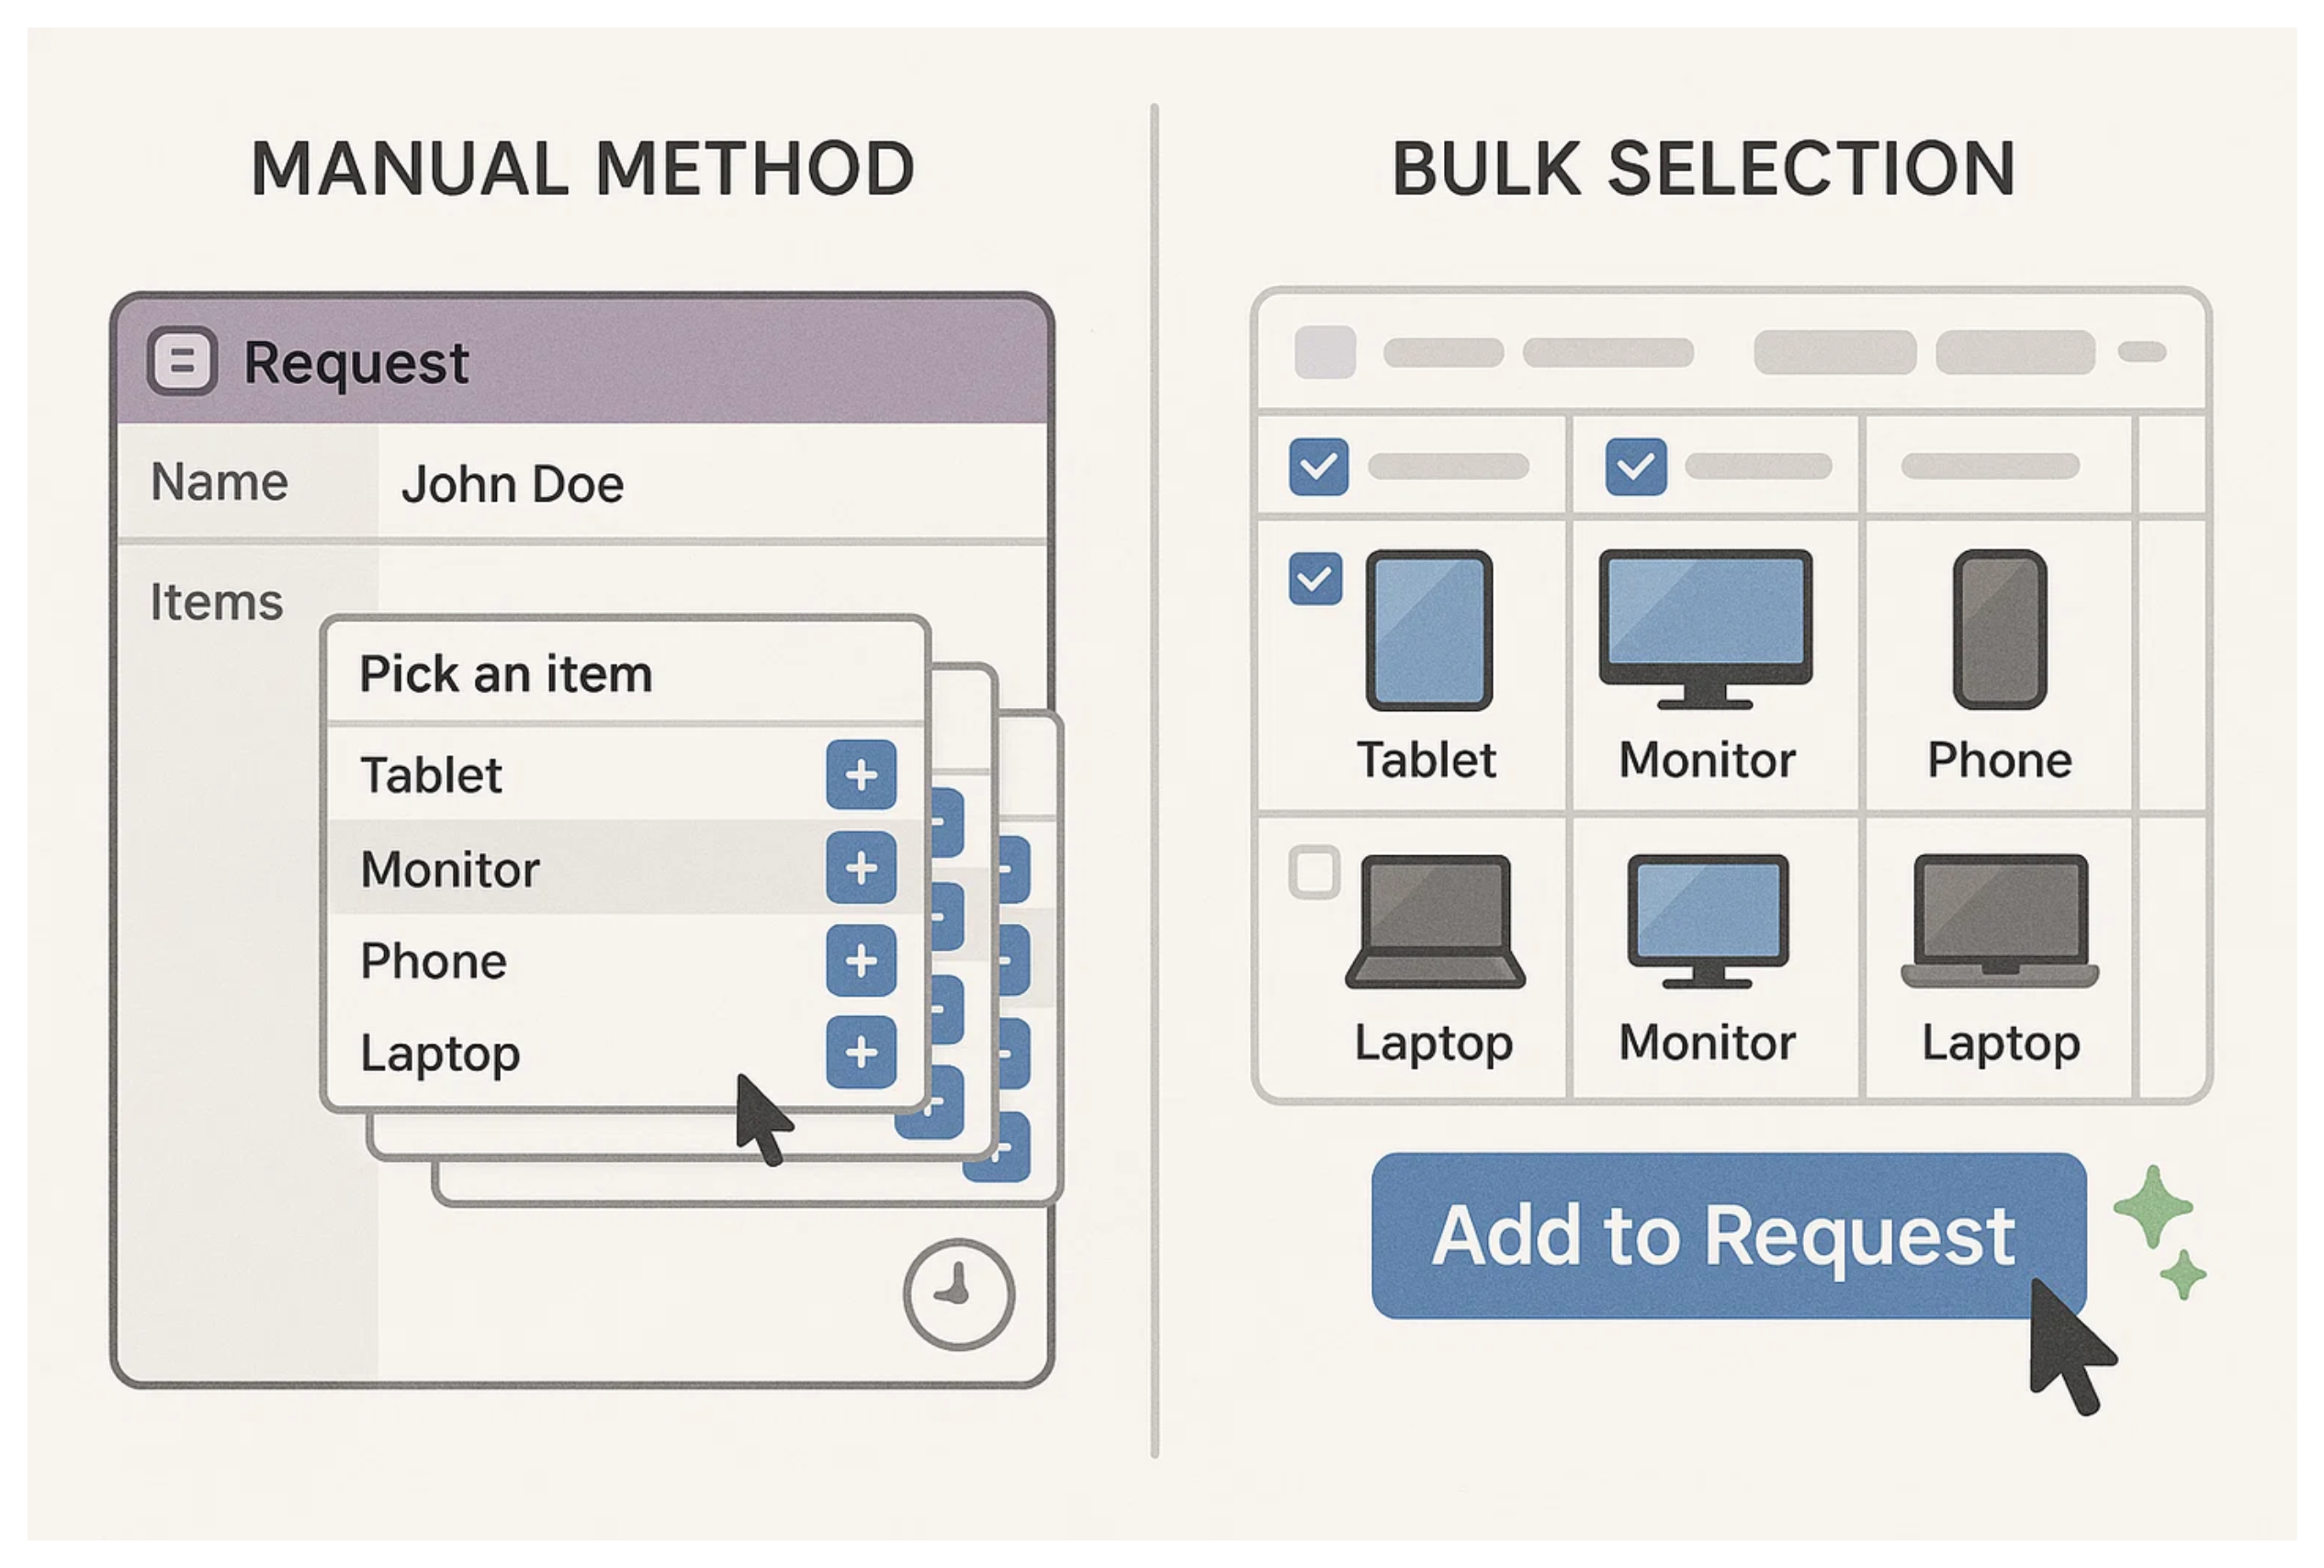
Let’s take an example. Say you manage an inventory of equipment for a construction company. For each new site project, your team needs to create a Project Request that pulls in multiple items like drills, helmets, ladders, and toolkits.
Instead of going into the Project Request and linking inventory items one at a time, you want a way to select items in bulk and assign them in just a click or two.
Let me walk you through how you can set that up using Airtable Interfaces and Automations.
Step 1: Add a Selection Field
Start by adding a selection field in your Inventory table. You can use a simple checkbox field called Select.
But if multiple people will be doing this at the same time, a checkbox can lead to conflicts. Instead, use a linked record field that connects each inventory item to one or more users from a Users table. This way, multiple people can tag the same item without overwriting each other
Step 2: Build an Interface to Select Inventory Items
Next, build an interface based on the Inventory table. Show the inventory items in a list or grid view. Include the item name and the Select or Selected By field so users can pick the items they want to assign.
Add a button to the interface labeled something like Add to Project Request.
Step 3: Set Up the Automation
Now set up the automation. Start with a When button is clicked trigger. This comes from the interface button.
Next, add a Find records action. This will search the Inventory table and return all items where either the Select box is checked or the Selected By field matches the user who clicked the button.
Then, add a Create record action to make a new record in the Project Requests table. This will be the single request that holds all the selected items. You can fill in any default fields here like the name of the request, the user who triggered it, date created, and so on.
After that, add a Repeating group action to loop through each inventory item found. Inside this repeating group, use an Update record action to update the request you just created.
Add the current inventory item from the loop to the linked inventory field in that request. This builds the full list of items attached to the new request.
Still inside the loop, add one more Update record step to clear the selection field from the inventory item. That means unchecking the Select checkbox or clearing the Selected By field, depending on your setup.
This way, the automation creates one new request and links all the selected inventory items to it in one go.
It’s efficient, accurate, and works perfectly even when multiple team members are using it at the same time.