How to Manage Bookings and Prevent Double Bookings in Airtable
Airtable is well-suited to managing bookings: tracking who booked what slot, viewing the schedule in a calendar, and confirming availability. But preventing double bookings requires deliberate setup, because the right approach depends on how much demand your slots get.
Here is the complete data structure and the three approaches — from simplest to most reliable.
The Core Data Structure
Two tables form the foundation of any Airtable booking system.
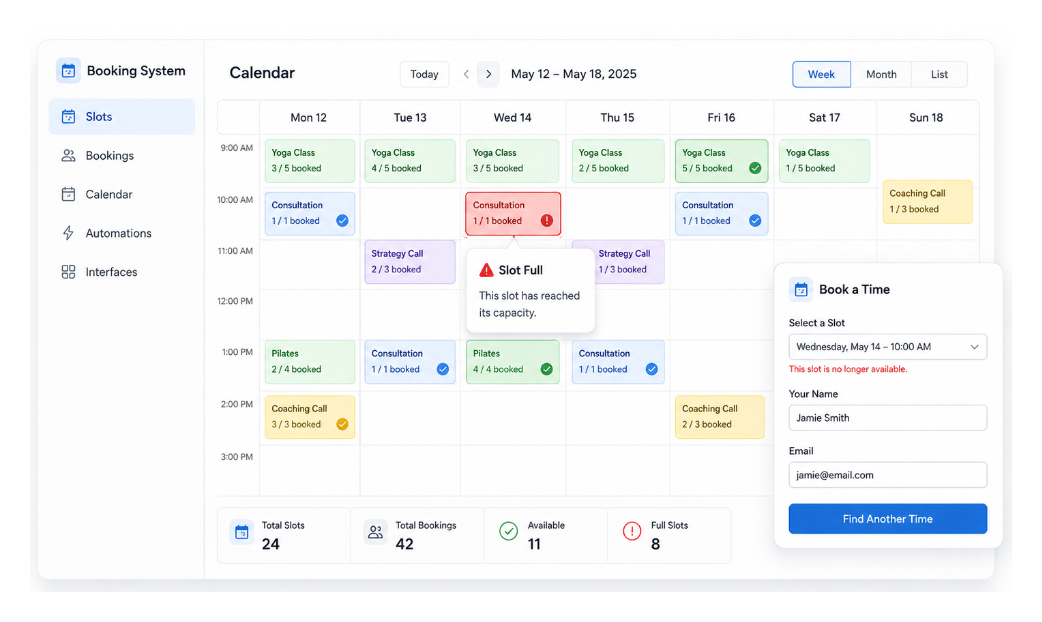
Slots table: Each record represents one available time slot. Fields to include:
- Slot Name (single line text) — e.g. "Monday 10am" or a generated label
- Date (date, include time) — when the slot occurs
- Capacity (number) — how many bookings this slot can accept
- Bookings Count (rollup) — counts linked Bookings records
- Available (formula) — returns TRUE if Bookings Count is less than Capacity:
{Bookings Count} < {Capacity} - Status (formula) — "Available" or "Full":
IF({Available}, "Available", "Full")
Bookings table: Each record is one booking. Fields to include:
- Slot (linked record to Slots)
- Name (single line text)
- Email (email)
- Booked At (created time)
With this structure, the Slots table always shows real-time availability based on how many Bookings records link to each slot.
The Core Problem: Race Conditions
The formula-based availability check works correctly in isolation. The problem is that native Airtable forms do not check availability at the moment of submission.
When someone opens a booking form, they see a list of available slots. They select one and click Submit. If two people submit simultaneously selecting the same last slot, both submissions succeed and both create Bookings records — the slot is now double-booked.
For low-traffic systems (a handful of bookings per day), this race condition is unlikely. For high-demand slots where many people compete simultaneously, you need one of the approaches below.
Approach 1: Filter the Form + Catch Overbookings After (Native Airtable)
This two-part native approach handles the majority of booking scenarios without any third-party tools.
Part A — Filter the form to only show available slots.
In the form editor, configure the linked record field for Slot to filter by Status where Status equals "Available". This means the dropdown only shows slots that still have capacity — preventing intentional overbooking and significantly reducing accidental overbooking.
This does not fully close the race condition (a slot could fill up between when the form loads and when it is submitted), but it eliminates the most common cause of conflicts.
Part B — Detect and cancel any overbookings that slip through.
Set up an automation triggered when a new Bookings record is created. The automation checks whether the linked slot's Bookings Count now exceeds Capacity. If it does:
- Update the booking's Status to "Cancelled — Overbooked"
- Send an email to the submitter explaining the situation and providing a link to rebook
The two parts work together: the filter prevents most conflicts upfront, and the automation catches the rare cases that get through. For most booking scenarios with predictable demand, this combination is sufficient.
The communication step in Part B is critical. A fast cancellation email with a clear rebook link keeps the experience acceptable even if the underlying race condition technically occurred.
Approach 2: Fillout with Conditional Submission Logic
Fillout can check Airtable data in real time at the moment of submission. Using Fillout's data-dependent logic, you can set a condition that a slot's Available field must be TRUE before the submission is accepted.
If a slot fills up between when someone opens the form and when they click Submit, Fillout blocks the submission and shows an error — before any Booking record is created. The person sees the conflict immediately and can choose a different slot.
This is the most user-friendly approach for high-demand scenarios. Unlike the post-submission cancellation in Approach 1, the person never receives a confirmation for a slot that turns out to be full.
Fillout connects to your existing Airtable Slots and Bookings tables. Your data structure stays the same.
Which Approach Should You Use?
| Approach 1 (Filter + Automation) | Approach 2 (Fillout) | |
|---|---|---|
| Setup | Native Airtable only | Requires Fillout |
| Prevents double booking | Reduces risk; catches conflicts after | Blocks conflicts before submission |
| User experience on conflict | Confirmation sent, then cancellation email | Error shown at submit time |
| Best for | Low–medium traffic, predictable demand | High demand or simultaneous bookings |
Start with Approach 1. If you are running a high-demand slot — a popular class, a flash booking window — upgrade to Approach 2.
Sending Confirmation Emails
Once a booking is created, send an automated confirmation email with the slot details.
Create an automation triggered when a Bookings record is created with Status "Confirmed". The Send email action references the booker's email and the slot's date and time via lookup fields.
For the confirmation email setup, see how to send a copy of a completed form to the submitter, which covers the same pattern applied to form submissions generally.