How to Show Multiple Date Fields in One Airtable Calendar View
You have two date fields on a record: a Start Date and a Due Date. Or a Kickoff Date and a Delivery Date. You want both to appear on the same calendar so you can see the full picture without switching between views.
Airtable supports this on paid plans. Here is how to set it up and make it readable.
Paid Plans: Display Multiple Date Fields on One Calendar
On Team, Business, and Enterprise Scale plans, a calendar view can display more than one date field simultaneously. Each date field you add appears as its own event on the calendar, all in the same view.
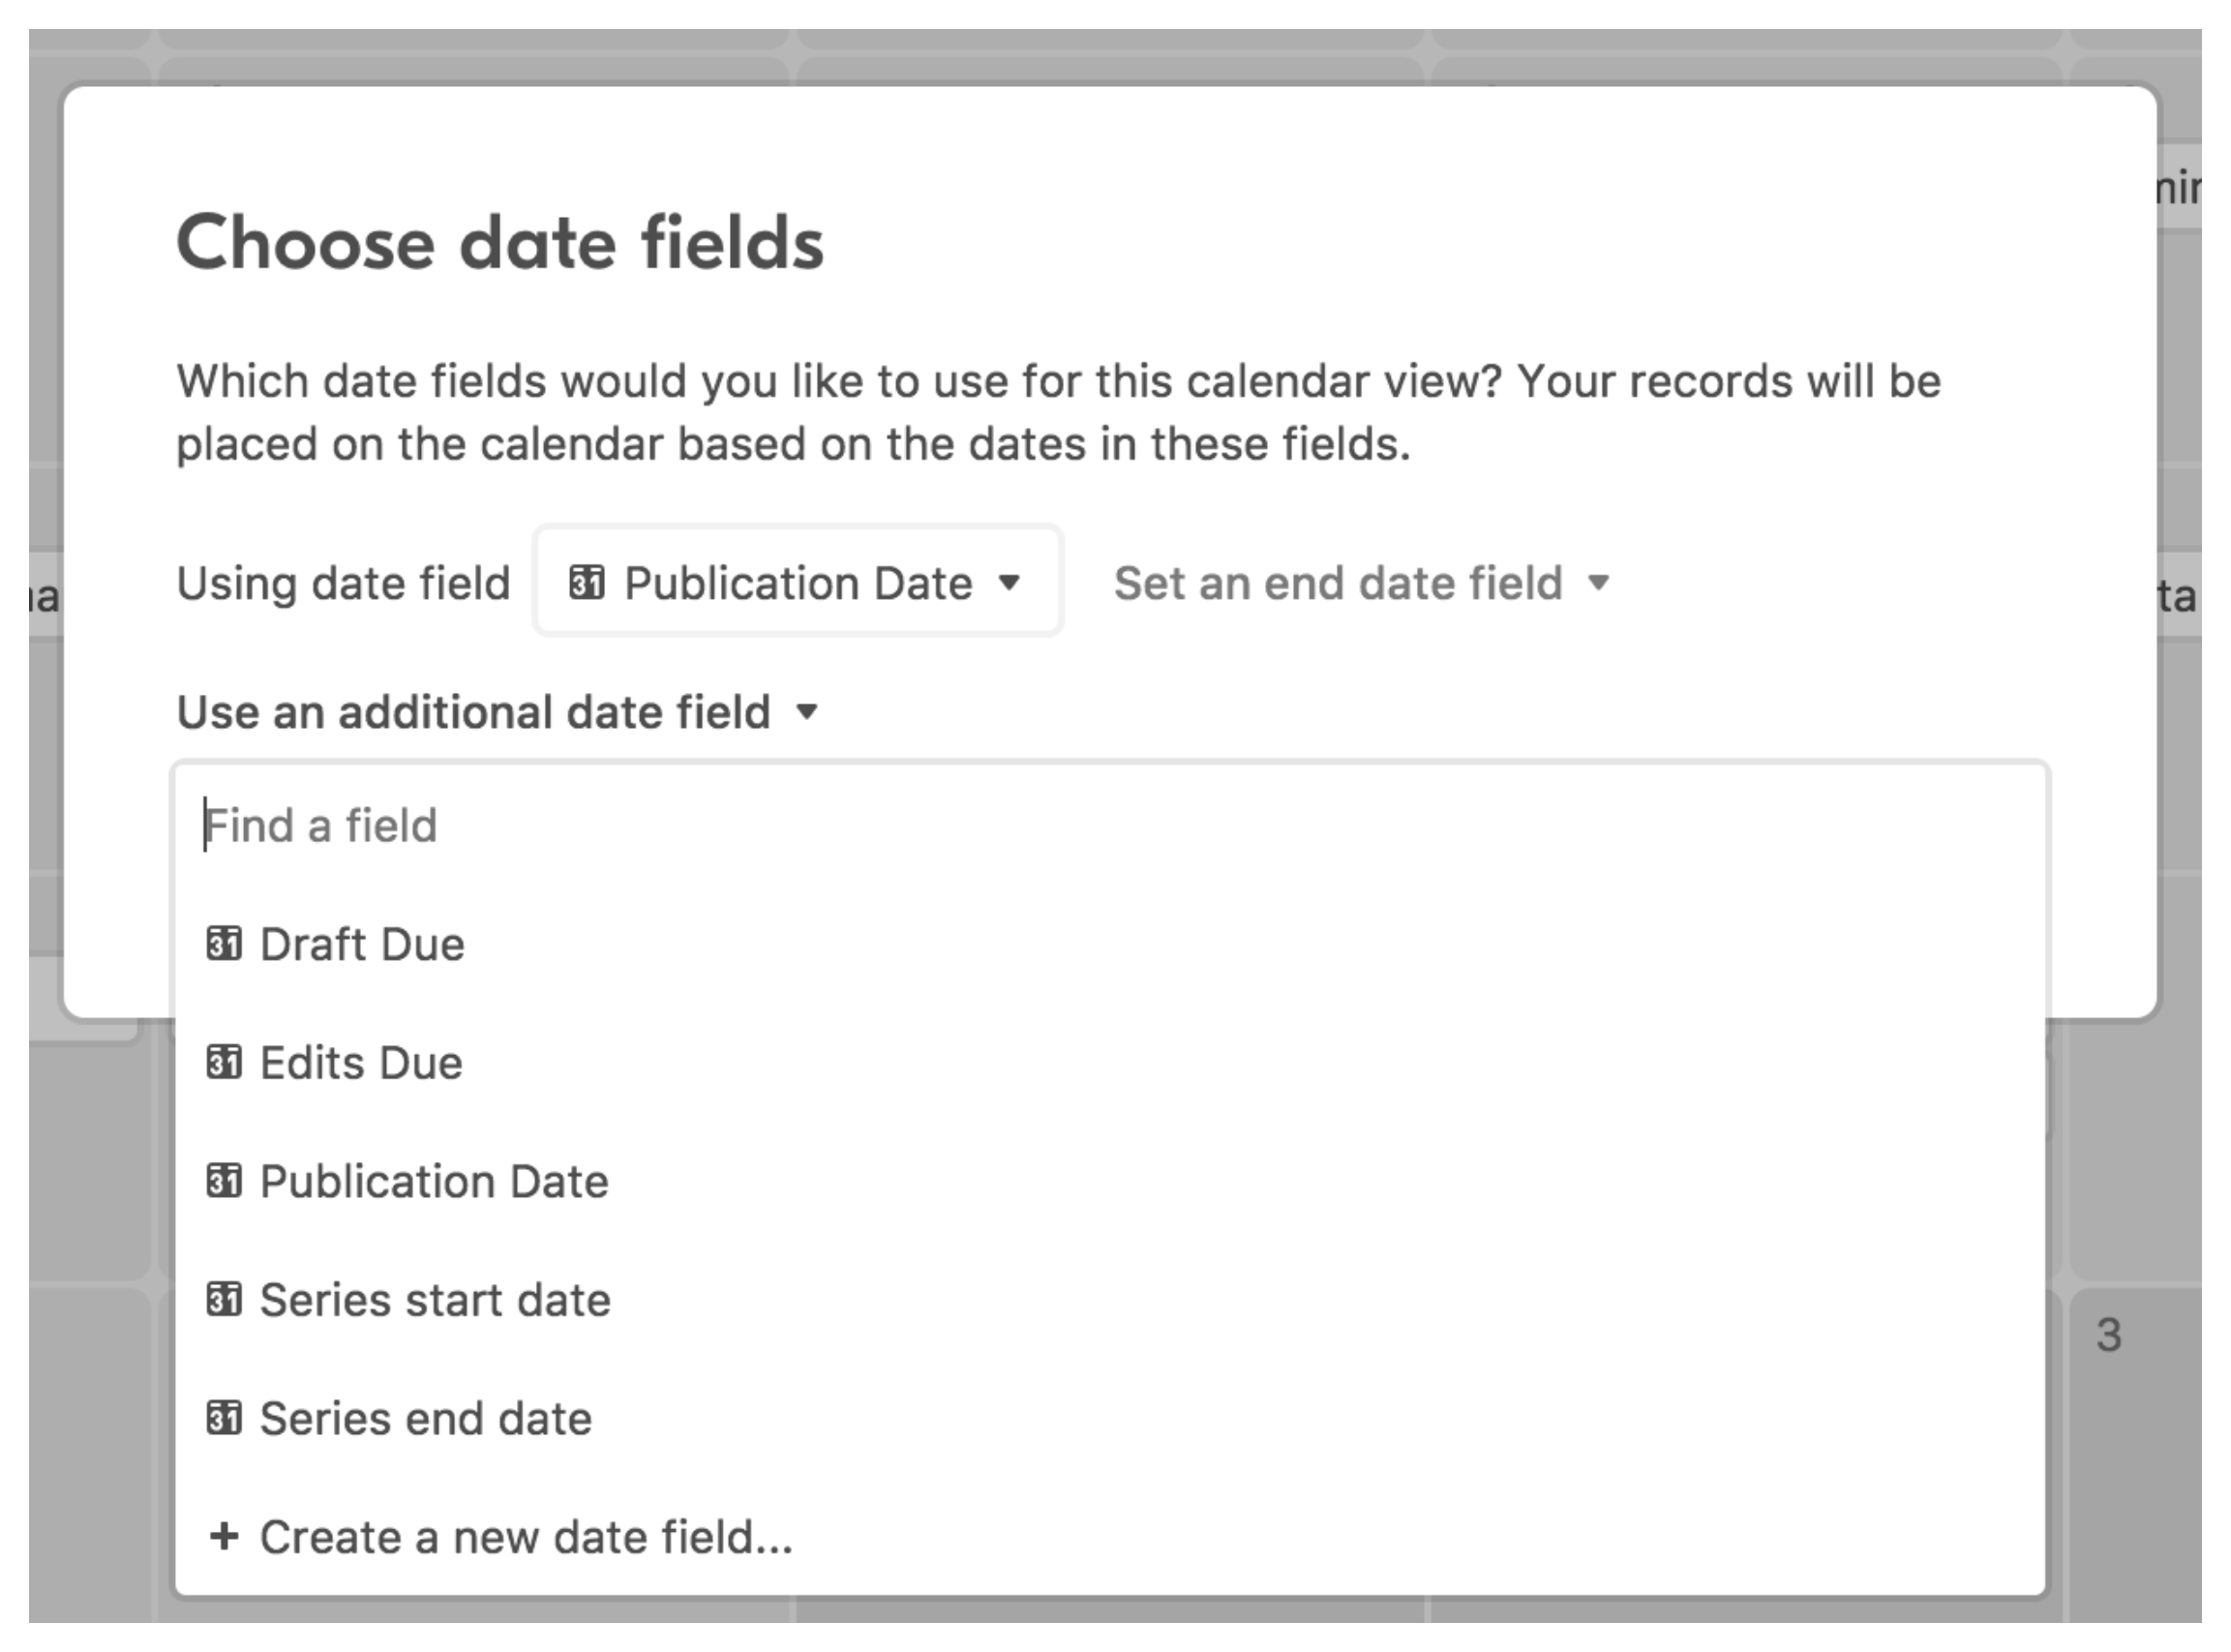
How to set it up:
- Open your base and switch to or create a Calendar view
- Click anywhere on the calendar canvas (not on a record). This opens the calendar's settings panel on the right side.
- In the settings panel, find the Date section
- You will see the primary date field already selected. Below it, look for an option to add additional date fields.
- Click the add option and select your second date field
Both dates now appear on the same calendar. A record with a Start Date of January 5 and a Due Date of January 20 will show two events on the calendar, one on each date, both representing the same record.
You can add more than two date fields if your table has them. Each one plots separately.
Colour-Coding Events by Date Type
When multiple date fields are displayed on the same calendar, it becomes important to visually distinguish which event represents which date. Without colour coding, a busy calendar becomes unreadable.
The cleanest approach is to use the Colour setting in the calendar to colour records by a single select field, then create a field specifically for calendar colour assignment.
Alternatively, if your table already has a Type or Category field that corresponds to the kind of event each record represents (for example, Milestone vs Meeting vs Deadline), colouring by that field automatically differentiates events on the calendar.
To set calendar colouring:
- Open the calendar settings panel
- Find the Colour section
- Select the field you want to colour by
Each option in the single select field gets its own colour, and events on the calendar are coloured accordingly.
Free Plan: Use a Single Date Field with a Type Identifier
On the Free plan, calendar views only support one date field. You cannot add additional date fields to the calendar.
The workaround is to use a single date field for all event types and add a separate field to identify what each date represents.
Setup:
- Use one Date field for all dates across all event types
- Add a Type single select field with options for each kind of date: Deadline, Kickoff, Review, and so on
- Create a calendar view using the single Date field
- Colour the calendar by the Type field so each event type appears in a different colour
This approach works well when the event types are genuinely different enough to warrant separate colours. The calendar ends up showing all dates together, colour-coded, which gives a similar visual result to the multi-date-field approach on paid plans.
The limitation is that a record with both a Start Date and a Due Date would need to appear twice in the table (once for each date) to show both on the calendar. This is not ideal for records that have multiple meaningful dates.
Using an Interface Calendar Instead
If you are building a calendar for your team to use in an Interface rather than directly in the base, the Interface calendar element also supports multiple date fields on paid plans. The setup is the same: click the calendar element in the Interface editor, open its settings panel, and add the additional date fields from there.
Interface calendars have the added benefit of allowing you to control which record details users see when they click an event, and you can combine the calendar with other Interface elements like a record list or summary stats on the same page.
Showing Records from Two Different Tables on One Calendar
A different but related challenge: you want records from two separate tables to appear on the same calendar. For example, Tasks from a Tasks table and Events from an Events table, both showing on one unified view.
Airtable calendars are powered by a single table. A calendar view in your base can only draw records from the table it belongs to. There is no native way to show records from two different tables on one calendar.
The workaround is to consolidate the records into a single table, then build the calendar on that table.
Option 1: Merge the tables If Tasks and Events have similar enough fields (Name, Date, Type), combine them into one table with a Type field (single select: Task, Event). Build your calendar on this unified table and colour by Type to distinguish them visually.
Option 2: Use a dedicated Calendar table fed by automations Keep Tasks and Events in separate tables. Create a third Calendar Events table with just two fields: Name and Date. Set up automations on each source table to create a corresponding record in Calendar Events whenever a Task or Event is created or updated. Build the calendar on this mirror table.
The calendar shows all events together, colour-coded if you add a Source field (Task vs Event). The downside is that edits to the original records do not automatically update the calendar table unless your automations also handle updates and deletions.
Option 3: Use an Interface calendar element Interface calendars also draw from a single table, so this does not bypass the limitation. The same consolidation approaches apply.
If you are using this calendar in a client-facing Interface, see how to share Airtable interfaces with clients for access and pricing options.
For embedding a calendar externally or sharing it with people outside your workspace, see how to fix embedded Airtable calendars defaulting to month view for the embedding setup, and 6 ways to share Airtable interfaces with clients for the access options.