How to Take Regular Data Snapshots in Airtable
If you want to know what your Airtable data looked like last week or last month, create a history table and copy the records into it on a schedule.
I’ll use a sales pipeline as the example. The main Deals table contains the current pipeline. Each week, an automation will copy the open deals into a Pipeline History table with the deal stage, value, and date of the snapshot.
This gives you a record of how the pipeline changed over time. You can then compare last month’s numbers with the current pipeline instead of trying to reconstruct the past from individual record changes.
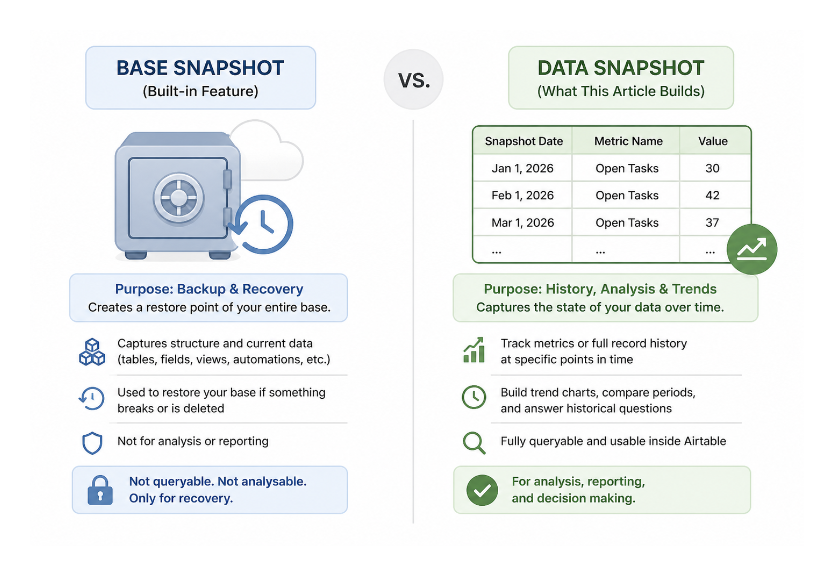
Airtable snapshots are for recovery
Airtable also has a built-in Snapshots feature. It saves a version of the entire base, including its tables, records, views, automations, and interfaces. You can restore that version as a new base if a structural change or accidental edit causes a problem.
Snapshots are not a report that you can filter by date, and Airtable does not support scheduling them at a set weekly or monthly time. Use the built-in feature for recovery. Use a history table when you want to compare data over time.
For more on recovery snapshots and retention by plan, see how to back up and restore an Airtable base.
Create the history table
In the same base, create a table called Pipeline History. Add the fields you want to preserve from the Deals table:
| Field | Type | What it stores |
|---|---|---|
| Deal name | Single line text | The deal name at the time of the snapshot |
| Stage | Single select | The deal’s stage that week |
| Value | Currency | The deal value that week |
| Snapshot date | Date | When Airtable copied the deal |
| Deal ID | Single line text | The original deal’s record ID |
The history table stores ordinary values, rather than live lookups from Deals. That matters because a lookup would change when the deal changes, which would overwrite the historical view you are trying to keep.
You can add other fields from Deals, such as Owner, Close date, or Probability. Add the fields that help you answer the question you care about. You do not need to copy every field from the main table.
Copy the deals on a schedule
Now create an automation with the At a scheduled time trigger. Set it to run once a week, such as every Monday morning.
The automation needs to find the deals and create one history record for each deal.
1. Find the deals to copy
Add a Find records action and choose the Deals table.
Use a condition such as Stage is not Closed if you only want to track active deals. If you want a complete weekly picture, find every deal that should be included in the report.
Test the action and make sure it returns the records you expect.
2. Repeat the create action for every deal
Add a Repeating group after Find records. Use the records returned by that action as the input list.
Inside the repeating group, add a Create record action for the Pipeline History table. Map the current deal’s values to the new history record:
- Deal name from the deal name in Deals
- Stage from the current stage
- Value from the current deal value
- Deal ID from the Airtable record ID
- Snapshot date from the scheduled automation’s date and time
Test the repeating group with a small set of records. When the automation runs, Airtable creates one history record for each deal returned by Find records.
The Find records action can return up to 1,000 records per run. If the table is larger, split the records into smaller groups with separate conditions or use a script-based process designed for larger batches.
Compare the snapshots
After the automation has run a few times, open Pipeline History and group the records by Snapshot date. You can filter the table to one week, compare two dates, or create a chart from the saved values.
Because each history record contains the values from that particular week, changing a deal in Deals will not change the older history records.