How to Upload Multiple Images to Airtable as Separate Records
You’re collecting product photos from your team using an Airtable form.
Each person selects a few images, uploads them through the form, and hits submit.
You check your base and see all the files packed into a single row. One record. One cell. All the photos stacked inside the same attachment field.
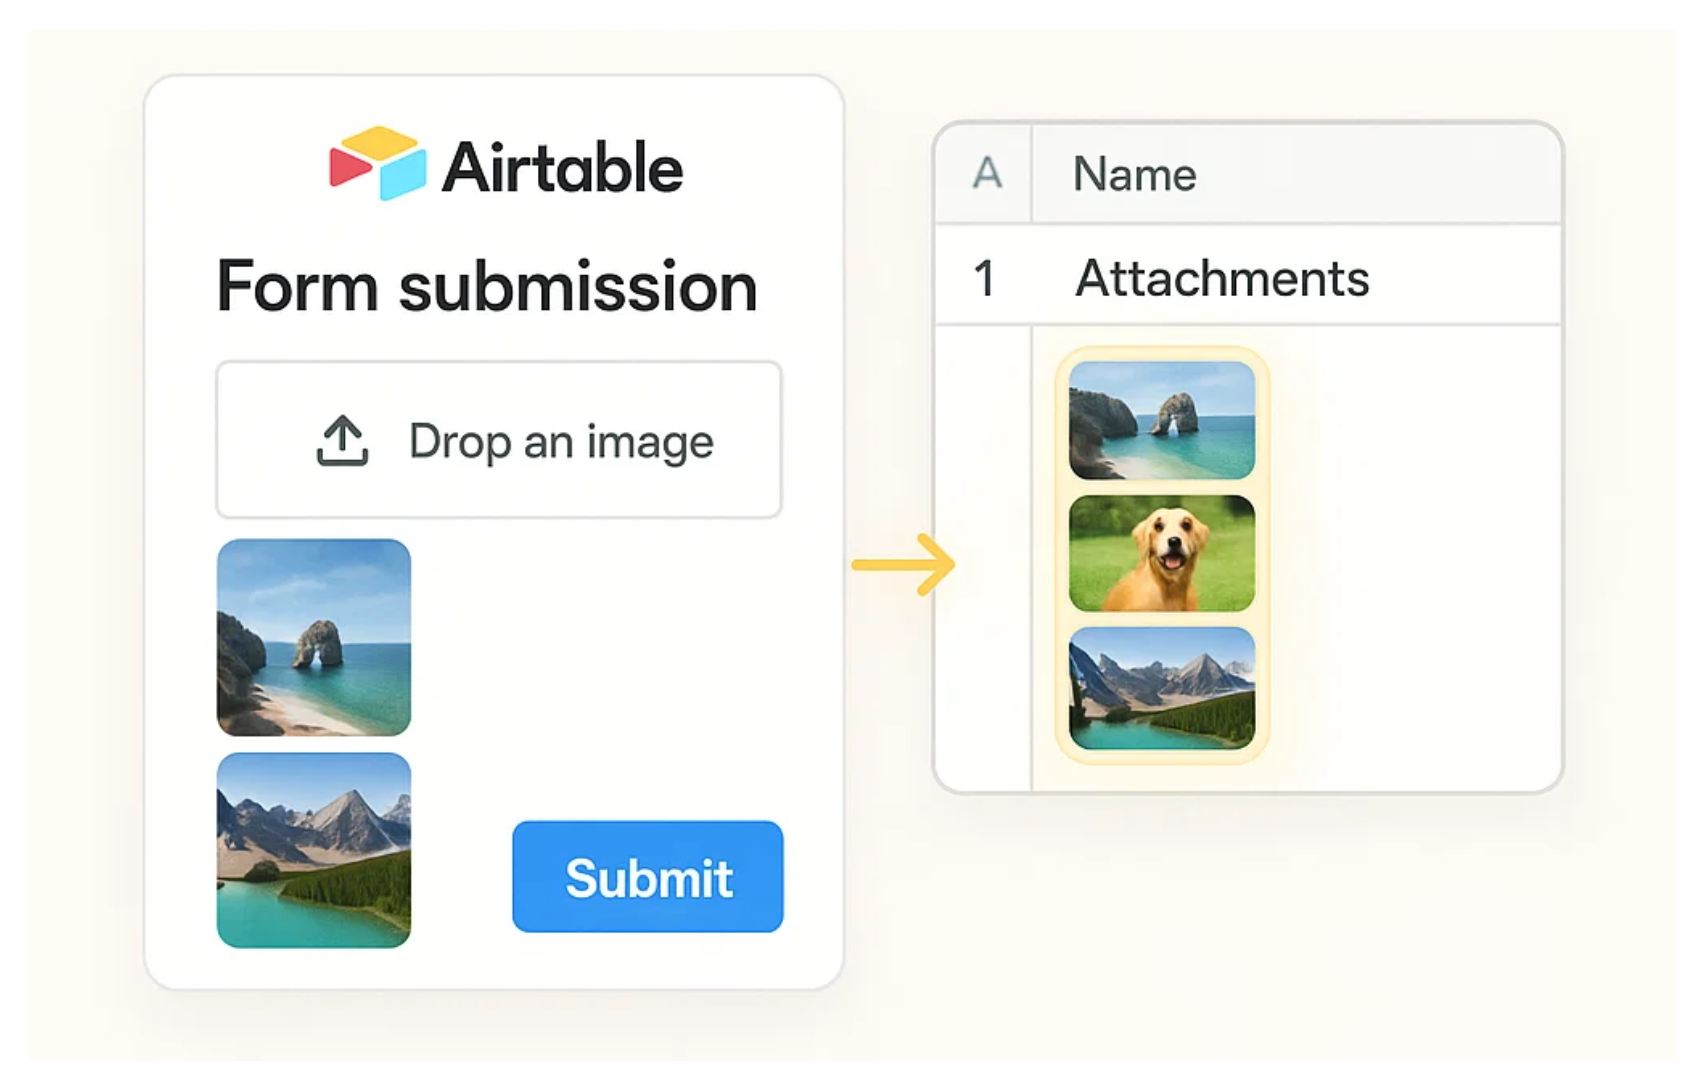
But you wanted each image to have its own record. One row per file. Clean and trackable.
By default, Airtable stores multiple uploads in one attachment field. That is fine for some use cases, but not if you need to tag or link each image individually.
Let me show you how to split them into separate records.
1. Use Drag and Drop to Create New Records

If you are uploading files manually, this is the fastest way to get each image into its own row.
Start by opening your table in Grid View. Then select all the images you want to upload. Drag them over the table, but do not release the mouse button just yet.
Instead, move your cursor to the bottom edge of the screen until you see the message that says “Drag here to create new records.” Once that message appears, let go.
Each image will be added to the table as its own record. Simple, clean, and quick.
Keep in mind that this can only be done from the Data layer. Airtable Interfaces do not currently support this kind of drag and drop.
2. Use a Form and Automation to Split the Files
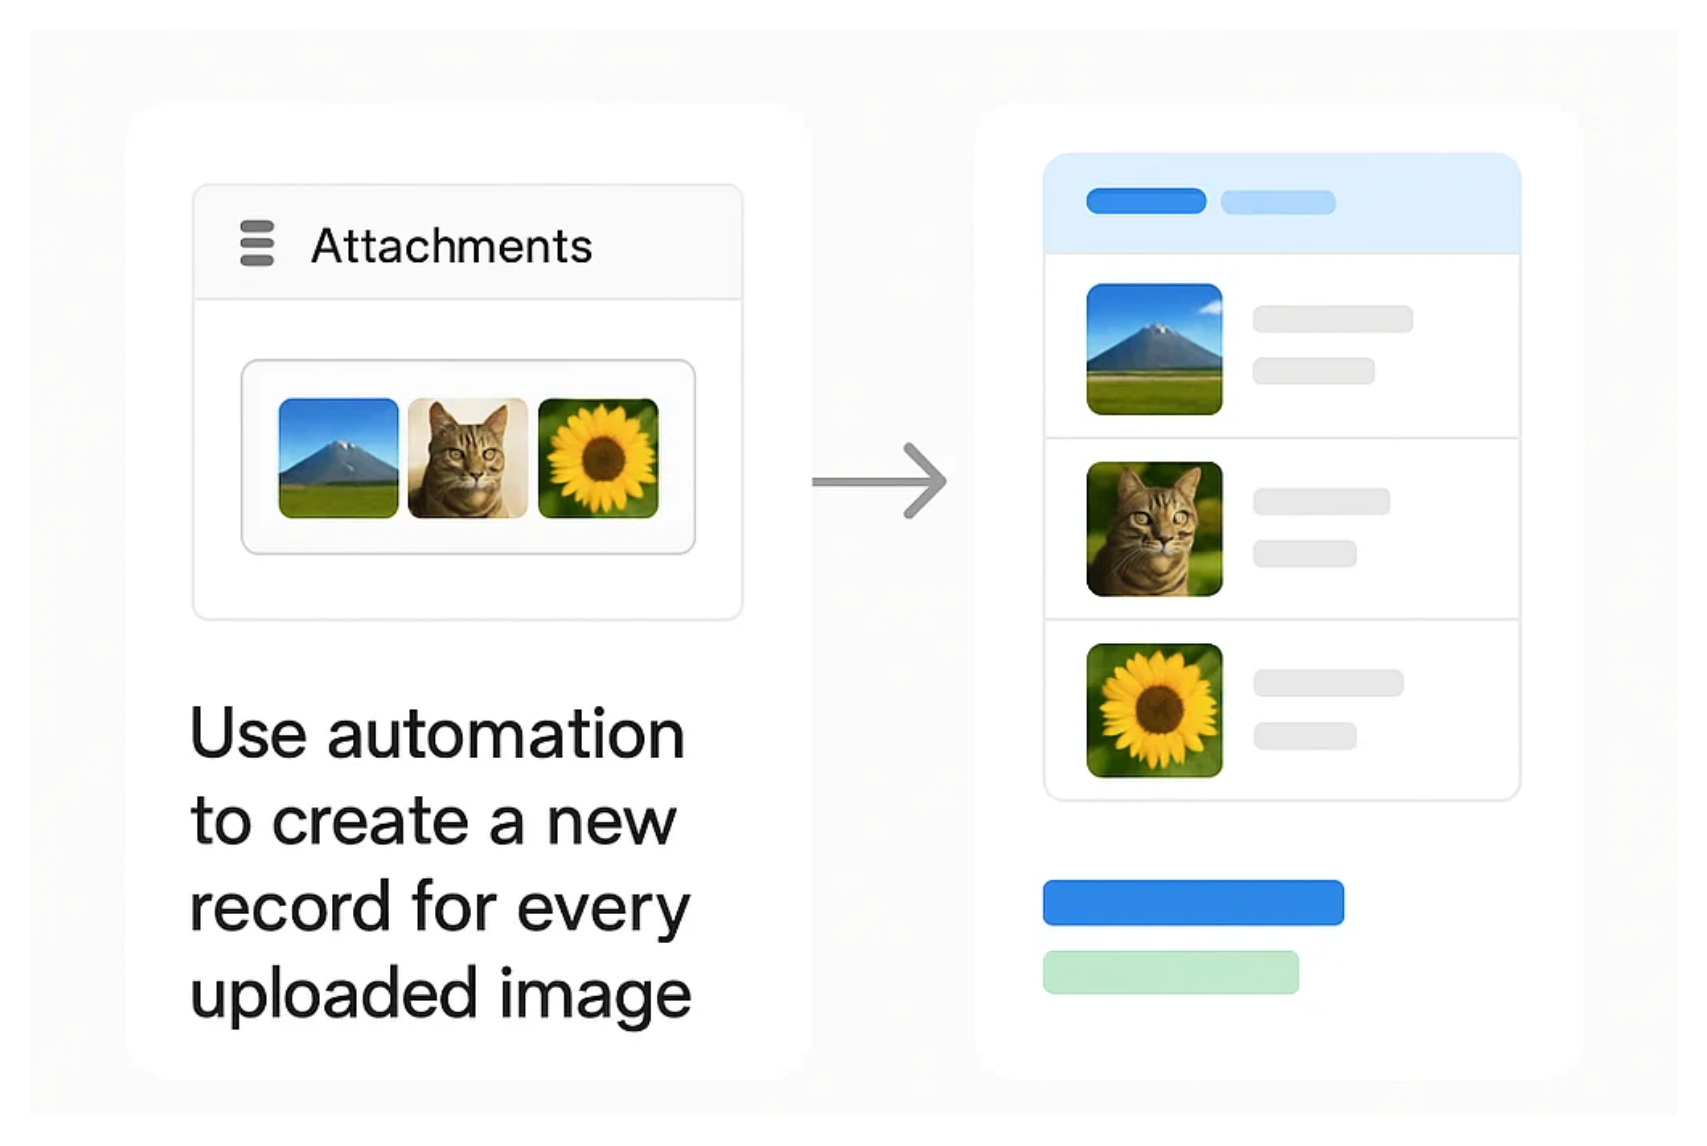
If you want others to upload files through a form, you will need a slightly more advanced setup.
Start by creating a table that is connected to your form. This is where users will upload their files. The form can include a single attachment field that allows multiple files.
Once that is in place, set up an automation that triggers whenever a new record is created in this table.
The automation should loop through the attachments in that field and create a new record for each file. These new records will be stored in a second table.
This second table becomes your clean, organized list of images, with one image per row.
It takes a little more effort to set up, but once it is running, the process is automatic. No manual cleanup required.
If you rely heavily on forms, consider checking out Fillout. It is a free tool that connects directly to Airtable and gives you much more control over how file uploads work.
With Fillout, you can limit the number of files a user can upload, set file size restrictions, and customize the upload experience to fit your needs.