How to See and Manage User Permissions in Airtable
When your Airtable workspace starts growing, managing who has access to what gets complicated quickly. You might have team members, clients, contractors, and read-only viewers all working in different bases and interfaces, each with different levels of access.
The frustrating part is that Airtable does not give you a single admin panel where you can see all of this in one place. There is no screen that shows you every user, their role, and every base or interface they can access.
Instead, permissions are split across three separate locations. Unless you know where each one lives, it is easy to give someone too much access, or realize too late that someone who should not have access still does.
This article walks through all three, what the roles actually mean, and how to make changes.
Where Permissions Live in Airtable
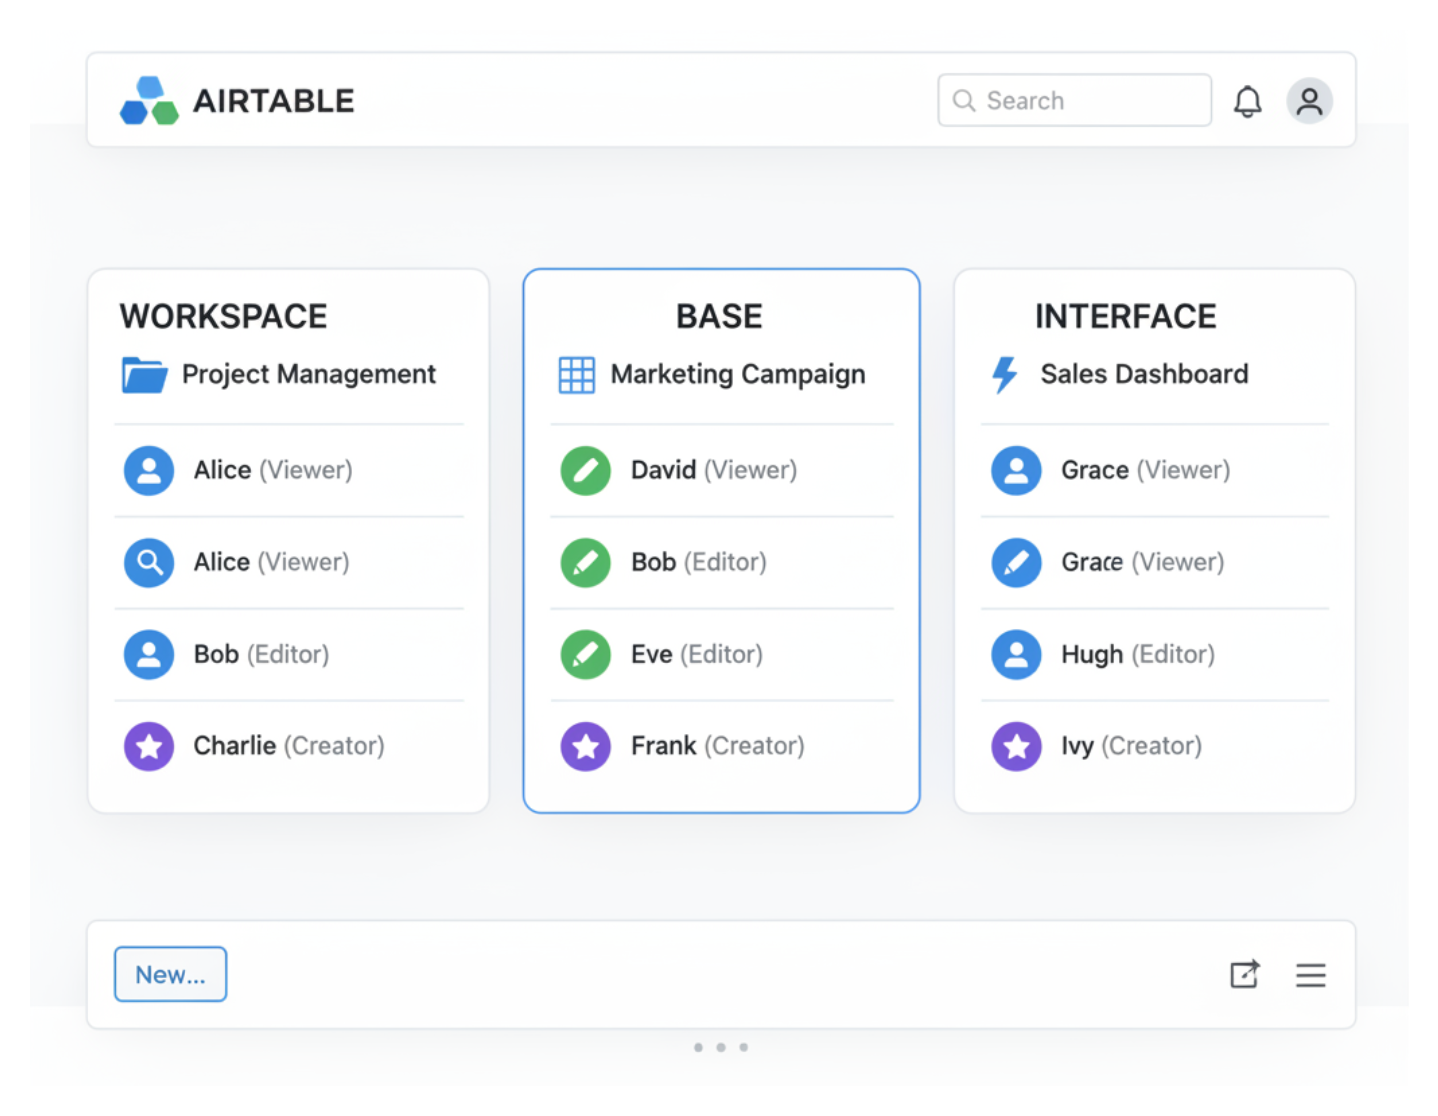
Before getting into each location, here is the quick overview. Airtable manages permissions at three levels:
- Workspace level — controls access to all bases inside a workspace
- Base level — controls access to a specific base, independent of workspace membership
- Interface level — controls who can view or interact with a specific interface inside a base
Each level is managed in a different place, and a user can have different roles at each level. Someone can be a read-only collaborator at the workspace level but an editor on a specific base, for example.
1. Workspace Permissions
Workspace permissions are the broadest. A user added at the workspace level gets access to every base inside that workspace, so this is the right place for core team members who work across everything.
To view and manage workspace collaborators:
-
Open your workspace from the left sidebar
-
Click your share button at the top right
-
Select People with access section.
You will see everyone who has workspace-level access and their assigned role. Only workspace owners can view or edit this list.

Workspace roles explained
| Role | What they can do |
|---|---|
| Owner | Full control. Can manage billing, delete the workspace, add or remove collaborators. |
| Creator | Can create and delete bases, run automations, manage collaborators within bases. |
| Editor | Can edit records, fields, and views. Cannot create new bases or manage billing. |
| Commenter | Can view records and leave comments. Cannot edit any data. |
| Read-only | Can view data only. Cannot comment or make changes. |
One thing worth knowing: read-only collaborators do not count as paid seats on any Airtable plan. If you have clients or stakeholders who only need to view data, you can add them as read-only at the workspace level without any additional cost.
2. Base Permissions
Base-level permissions let you give someone access to a specific base without adding them to the whole workspace. This is useful for external collaborators, freelancers, or clients who should only see one project.
To view and manage collaborators on a specific base:
-
Open the base
-
Click the Share button in the top-right corner
-
Look at the Collaborators section of the panel
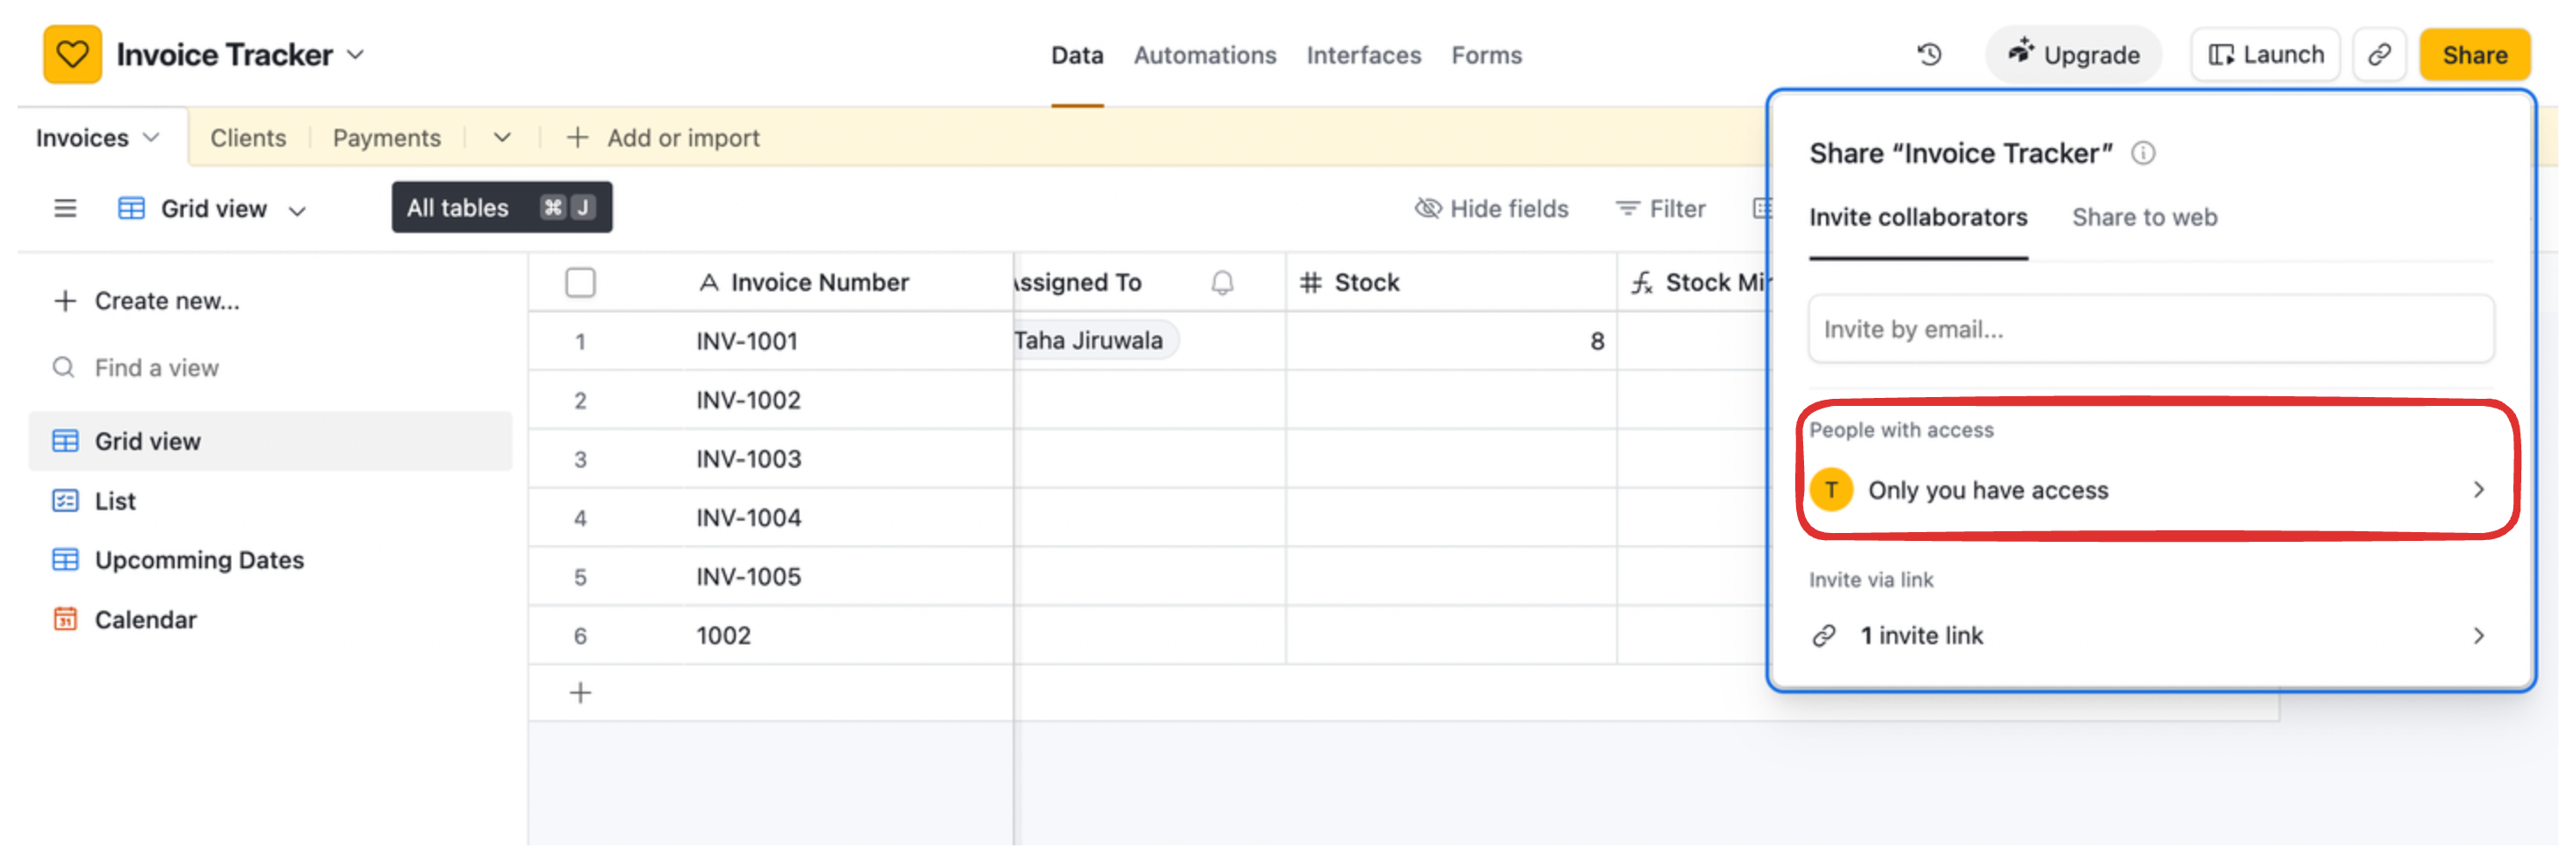
This panel shows everyone with direct access to that base, including people who were added at the workspace level and people who were invited to this base only. You can change roles or remove users from this same panel.
When base permissions override workspace permissions
A user's access to a specific base is determined by whichever role is higher — their workspace role or their base role. So if someone is an Editor at the workspace level but you add them as a Creator on a specific base, they get Creator access on that base.
You cannot restrict a workspace-level role with a base-level role. If someone is a Creator at the workspace level, you cannot give them read-only access to a specific base within that workspace.
3. Interface Permissions
Interface permissions work separately from both workspace and base permissions. Even if someone has editor access to a base, you can still control whether they can access specific interfaces and what they can do inside them.
To manage interface permissions:
-
Open the interface you want to manage
-
Click the Share button in the top-right corner of the interface builder
-
Select who can access the interface and at what level

Interfaces have their own permission model that is simpler than base permissions — you can give someone editor or viewer access at the interface level regardless of their base role. This is what makes interfaces useful for showing specific people a filtered view of your data without exposing the underlying tables.
If you are sharing an interface with clients or external users, you have two options. You can share a public link (anyone with the link can view it, no login required) or invite specific people by email. Public sharing is only available on the Team plan and above.
4. Field-Level Permissions
There is a fourth, less obvious permission layer that many people miss: field-level permissions. These let you control which users can edit a specific field, regardless of their overall base role.
To set field permissions:
-
Right-click any field header in the grid view
-
Select Edit field permissions
-
Choose which collaborator roles are allowed to edit that field
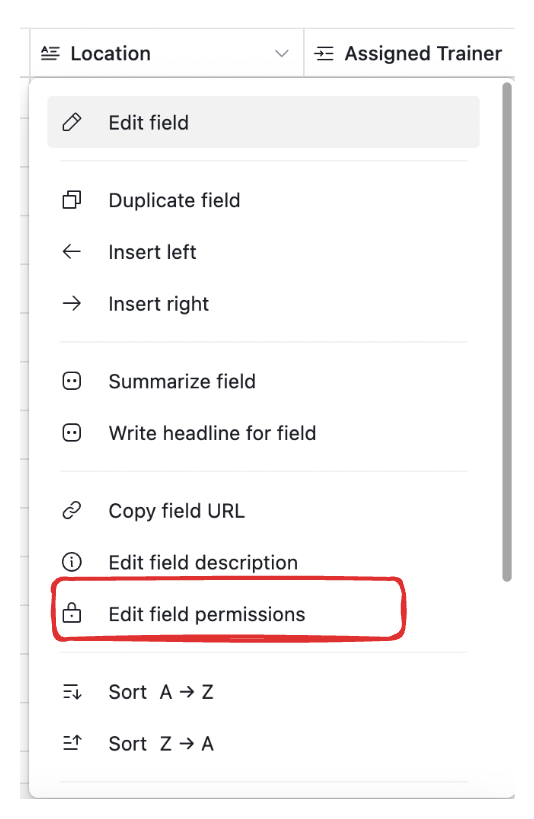
Field permissions are available on the Team, Business and Enterprise plans. They are useful for protecting things like status fields, formula results, or any field where you want only certain people to make changes.
Checking Who Has Access to What
Since there is no centralized admin view, the quickest way to audit your permissions is to do a manual pass:
-
Workspace collaborators — go to workspace settings → Collaborators. This gives you the broadest view.
-
Base-by-base — open each base, click Share, and check the collaborators list. Look for anyone who has direct base access that is not in your workspace list.
-
Interface-by-interface — if you have interfaces set up for clients or external users, open each one and check the Share settings.
It takes a few minutes, but this is the only way to get a complete picture without a third-party tool.
Removing Access
To remove someone's access:
-
At the workspace level: Go to workspace settings → Collaborators → click the three-dot menu next to their name → Remove
-
At the base level: Open the base → Share → find the user → change their role to remove access
-
At the interface level: Open the interface → Share → remove the user from the access list
When you remove someone from the workspace, they lose access to all bases within it. If they were also added directly to specific bases, those direct base invitations remain active — you need to remove them from each base separately.
What Airtable Cannot Do Natively
There are a few permission scenarios that Airtable's built-in system does not handle well:
-
Restricting access by row — you cannot natively hide specific records from certain users within a base. Interfaces can approximate this with filters, but it is not a true permission system.
-
Hiding specific tables — once a user has base access, they can see all tables. You cannot hide one table from one user at the base level.
-
A global admin view — there is still no single screen that shows all users and their permissions across every base and interface.
If you need more granular control — for example, showing different clients only their own records — the usual approach is to build that logic inside an Interface using filters, or to use a third-party tool.
For a deeper look at how to work around these limitations, see How to Restrict User Access by Table, Field, or Row in Airtable.
If you are sharing an interface with clients and want to understand the full range of options and what they cost, 6 Ways to Share Airtable Interfaces with Clients covers each method with a pricing breakdown.