How to Create a Registration Form with Limited Slots in Airtable
You want to create a registration system in Airtable where people can select a date from a list, but each date should have a limited number of available spots.
This kind of setup is often required for a variety of use cases such as event registrations, meeting slots, interviews, or volunteer scheduling where you need to control how many participants can register for each date or session.
Here is how to set up a registration form with a limit on available slots or capacity, using only native Airtable features.
Setting Up the Tables
Start by setting up the tables in your Airtable base.
For this, you will need two tables.
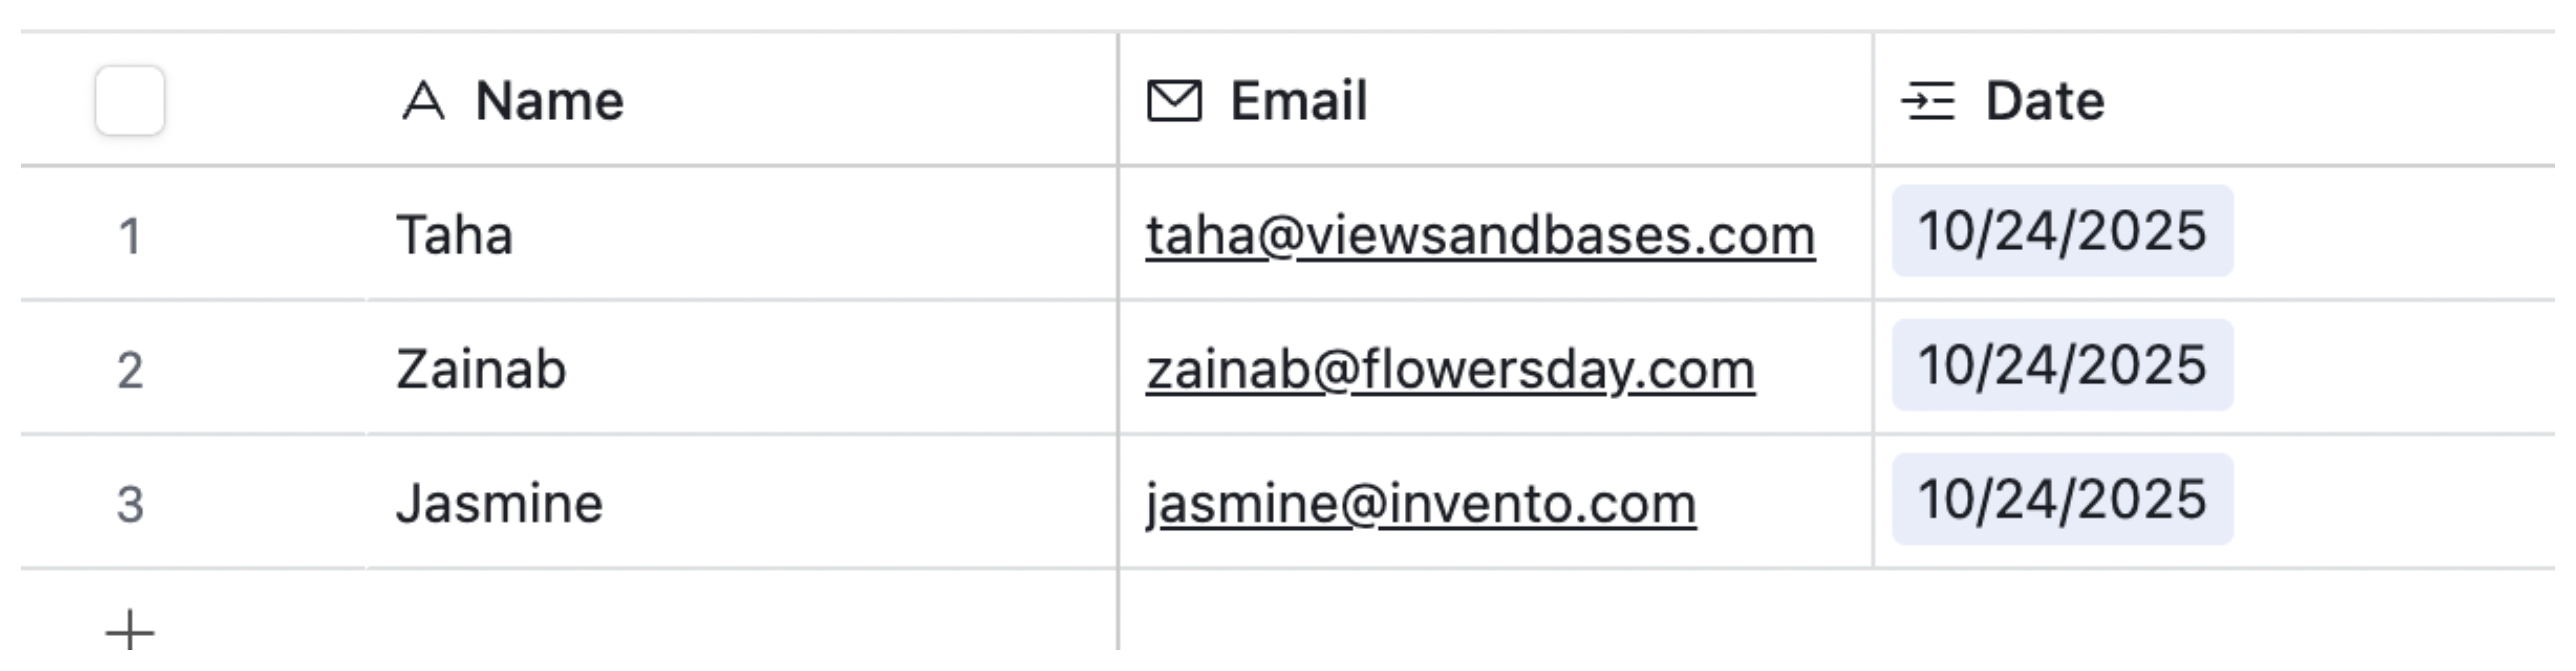
One for Dates, which will serve as the dropdown in your form where people can select a date, and another for Registrations, where the details of each participant will be stored.
In the Registrations table, add:
-
Name - A single line text field for the participant’s name.
-
Email - An email field for the participant’s email address.
-
Date - A linked record field connected to the Dates table.
In the Dates table, add the following fields:
-
Date - A date field listing all available dates.
-
Capacity - A number field showing the maximum number of people allowed for that date.
-
Submission Count - A count field that tracks the number of linked registrations from the Registrations table.
-
Capacity Left - A formula field that shows how many spaces are left using the formula:
Capacity - {Submission Count}

With this setup, each registration links back to a specific date, allowing Airtable to automatically count how many people have registered for that date. This will help you limit the number of participants that can register for an event.
With the tables ready, let’s move on to setting up the form.
Setting Up the Form
On the top bar of your Airtable base, go to the Forms tab.
Click + New Form to create a new form. This will open a modal asking for two details:
-
Select the table where form responses will be stored. Choose the Registrations table from the dropdown.
-
Enter a name for your form, such as “New Registration Form.”
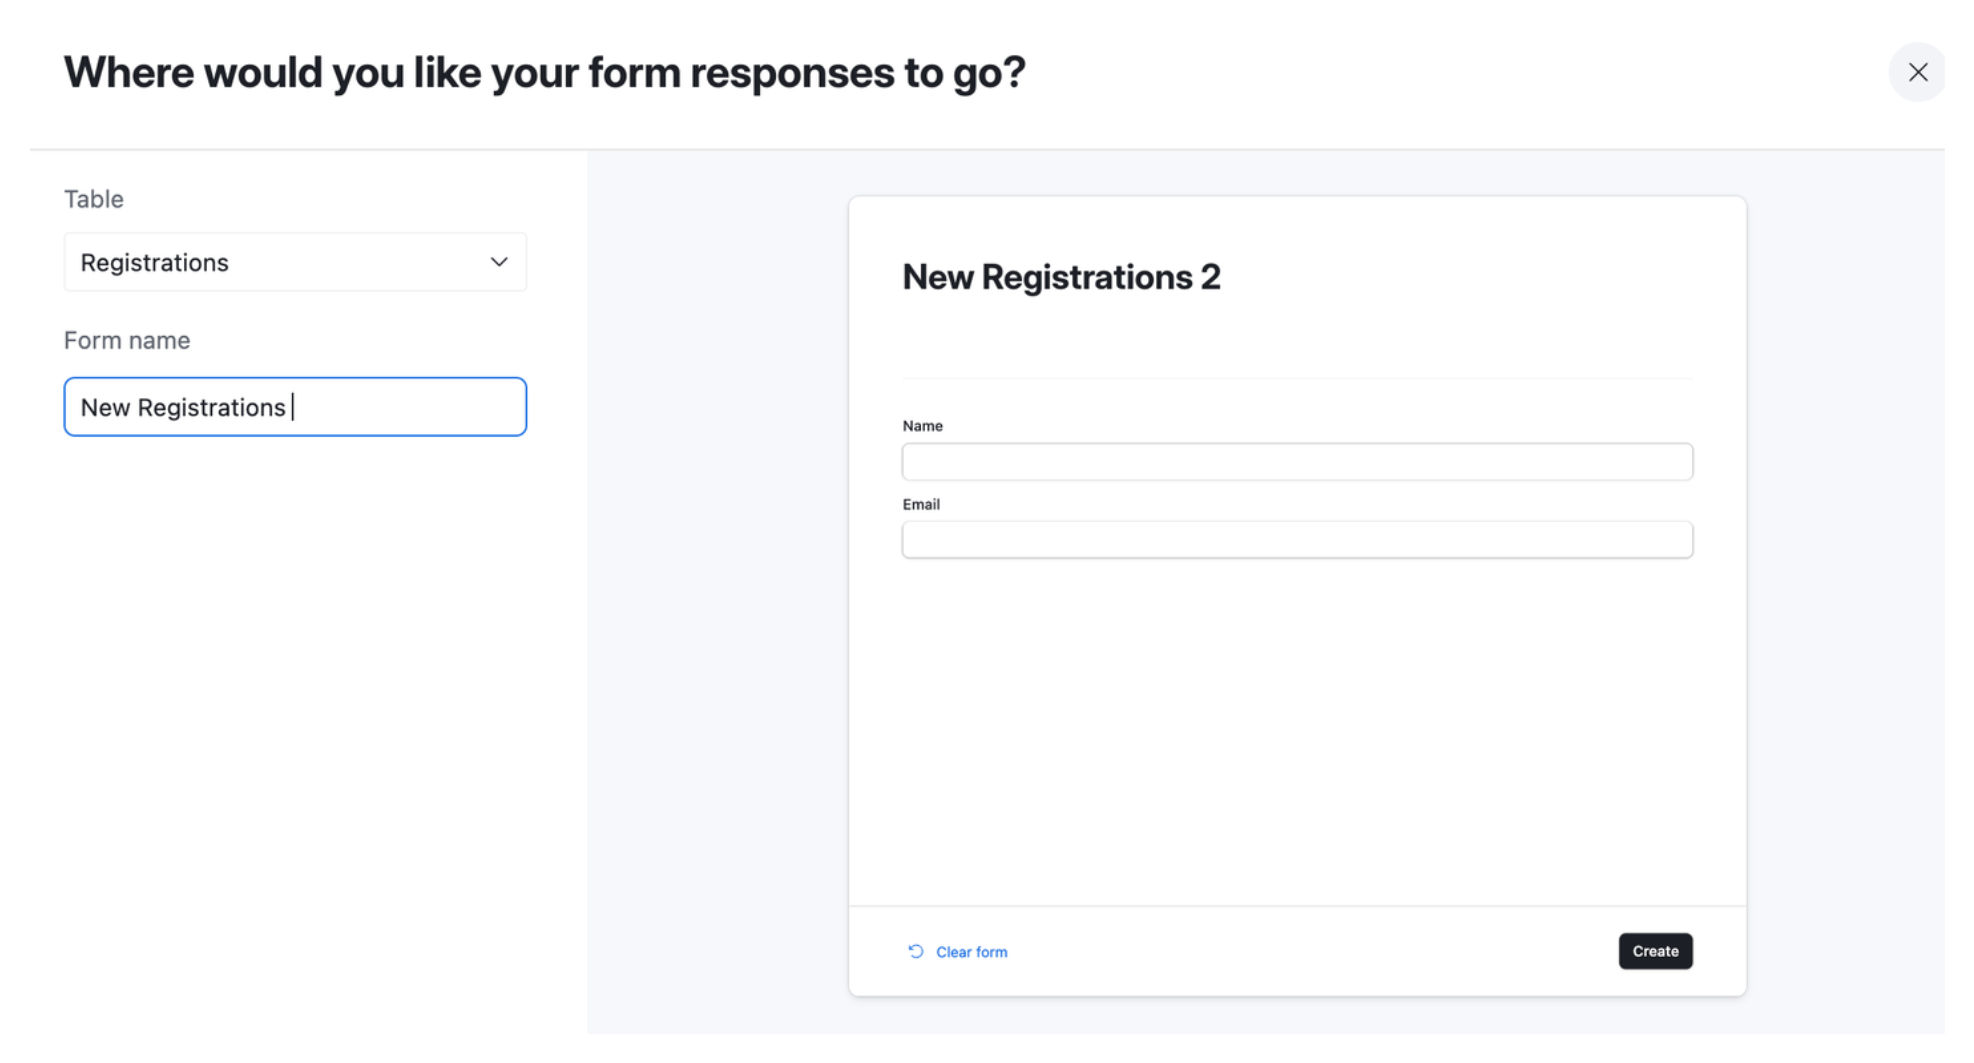
Then click Create to generate the form.
Once the form opens, add the fields you want participants to fill out. For this setup, include Name, Email, and Date.
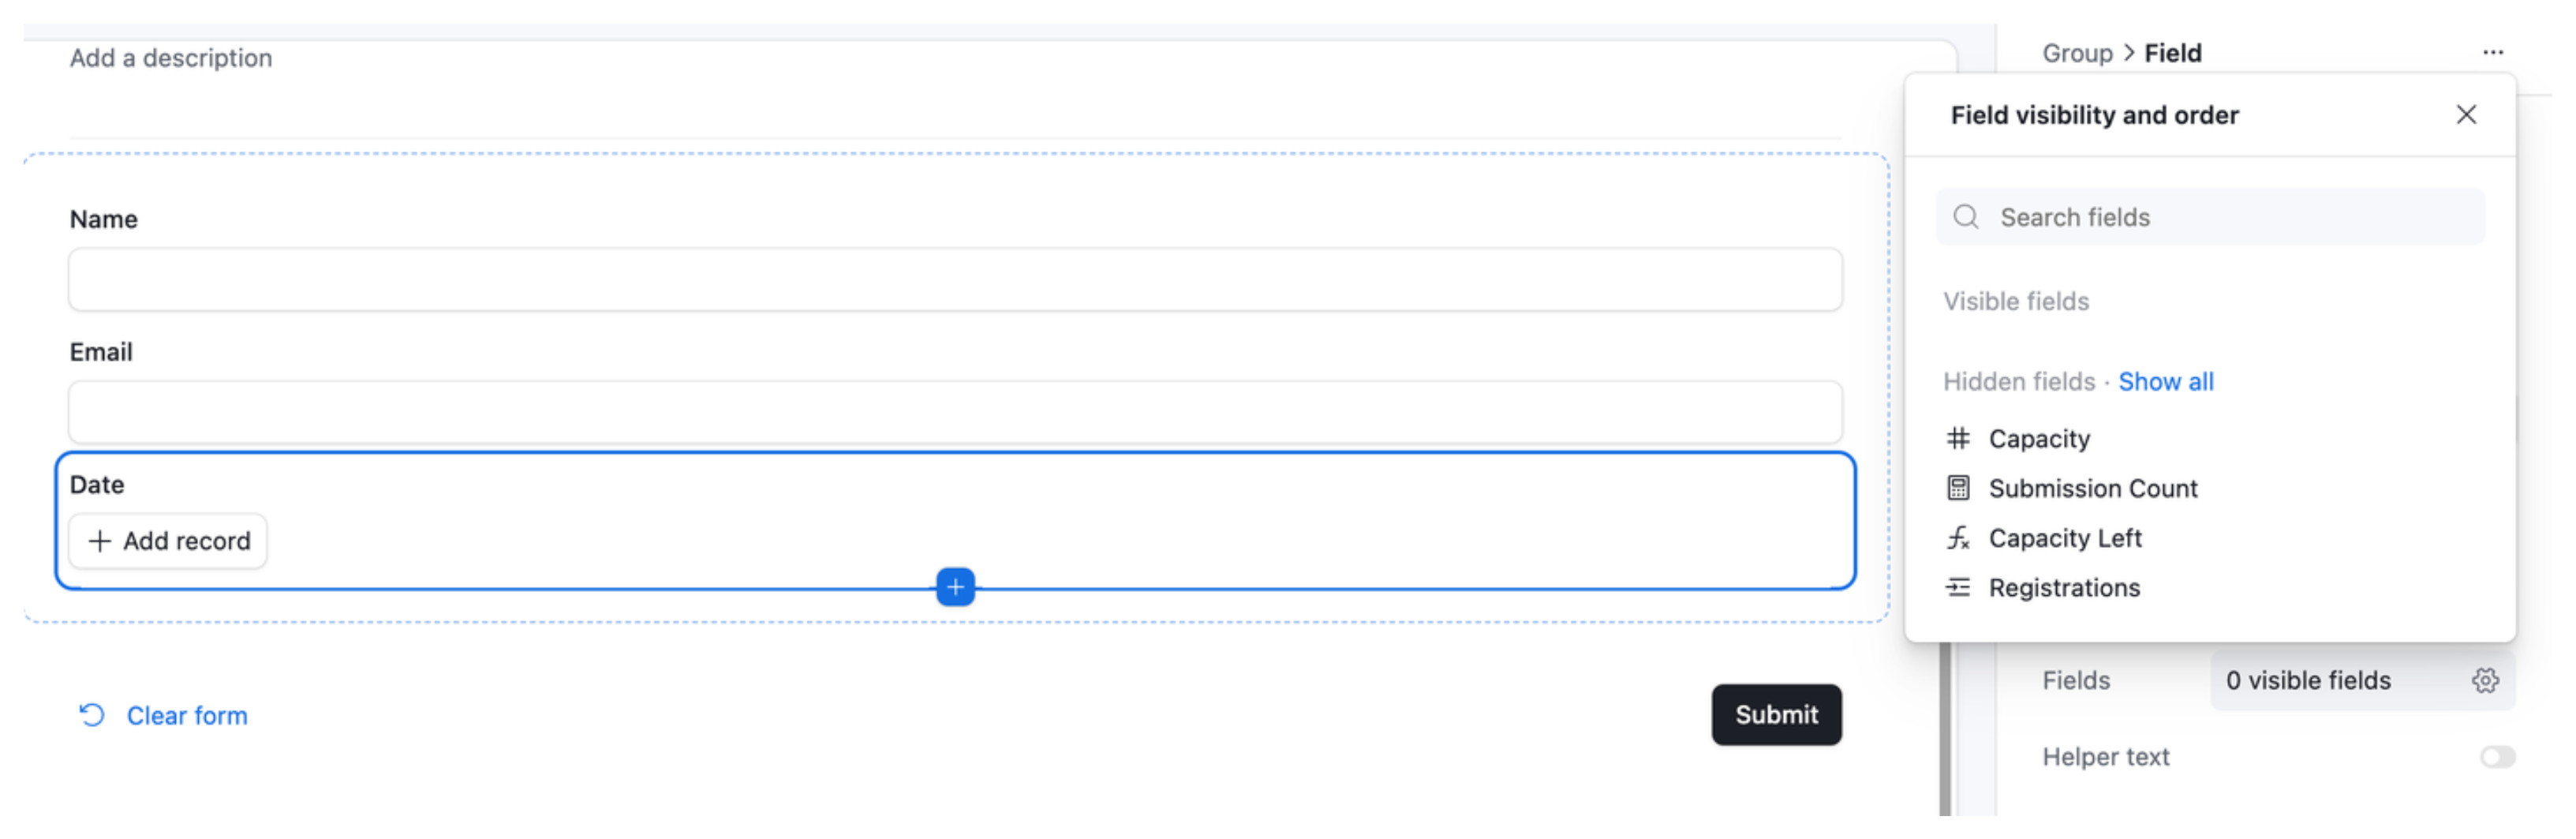
Next, click on the Date field to open its settings panel on the right-hand side. There are two important adjustments to make here:
1. Hide extra details from the linked table
In the Appearance section, expand the Fields settings.
By default, the Date field may show extra information from the linked Dates table. To avoid this, hide all the fields so that participants can only see the date itself and not other details like capacity or count.
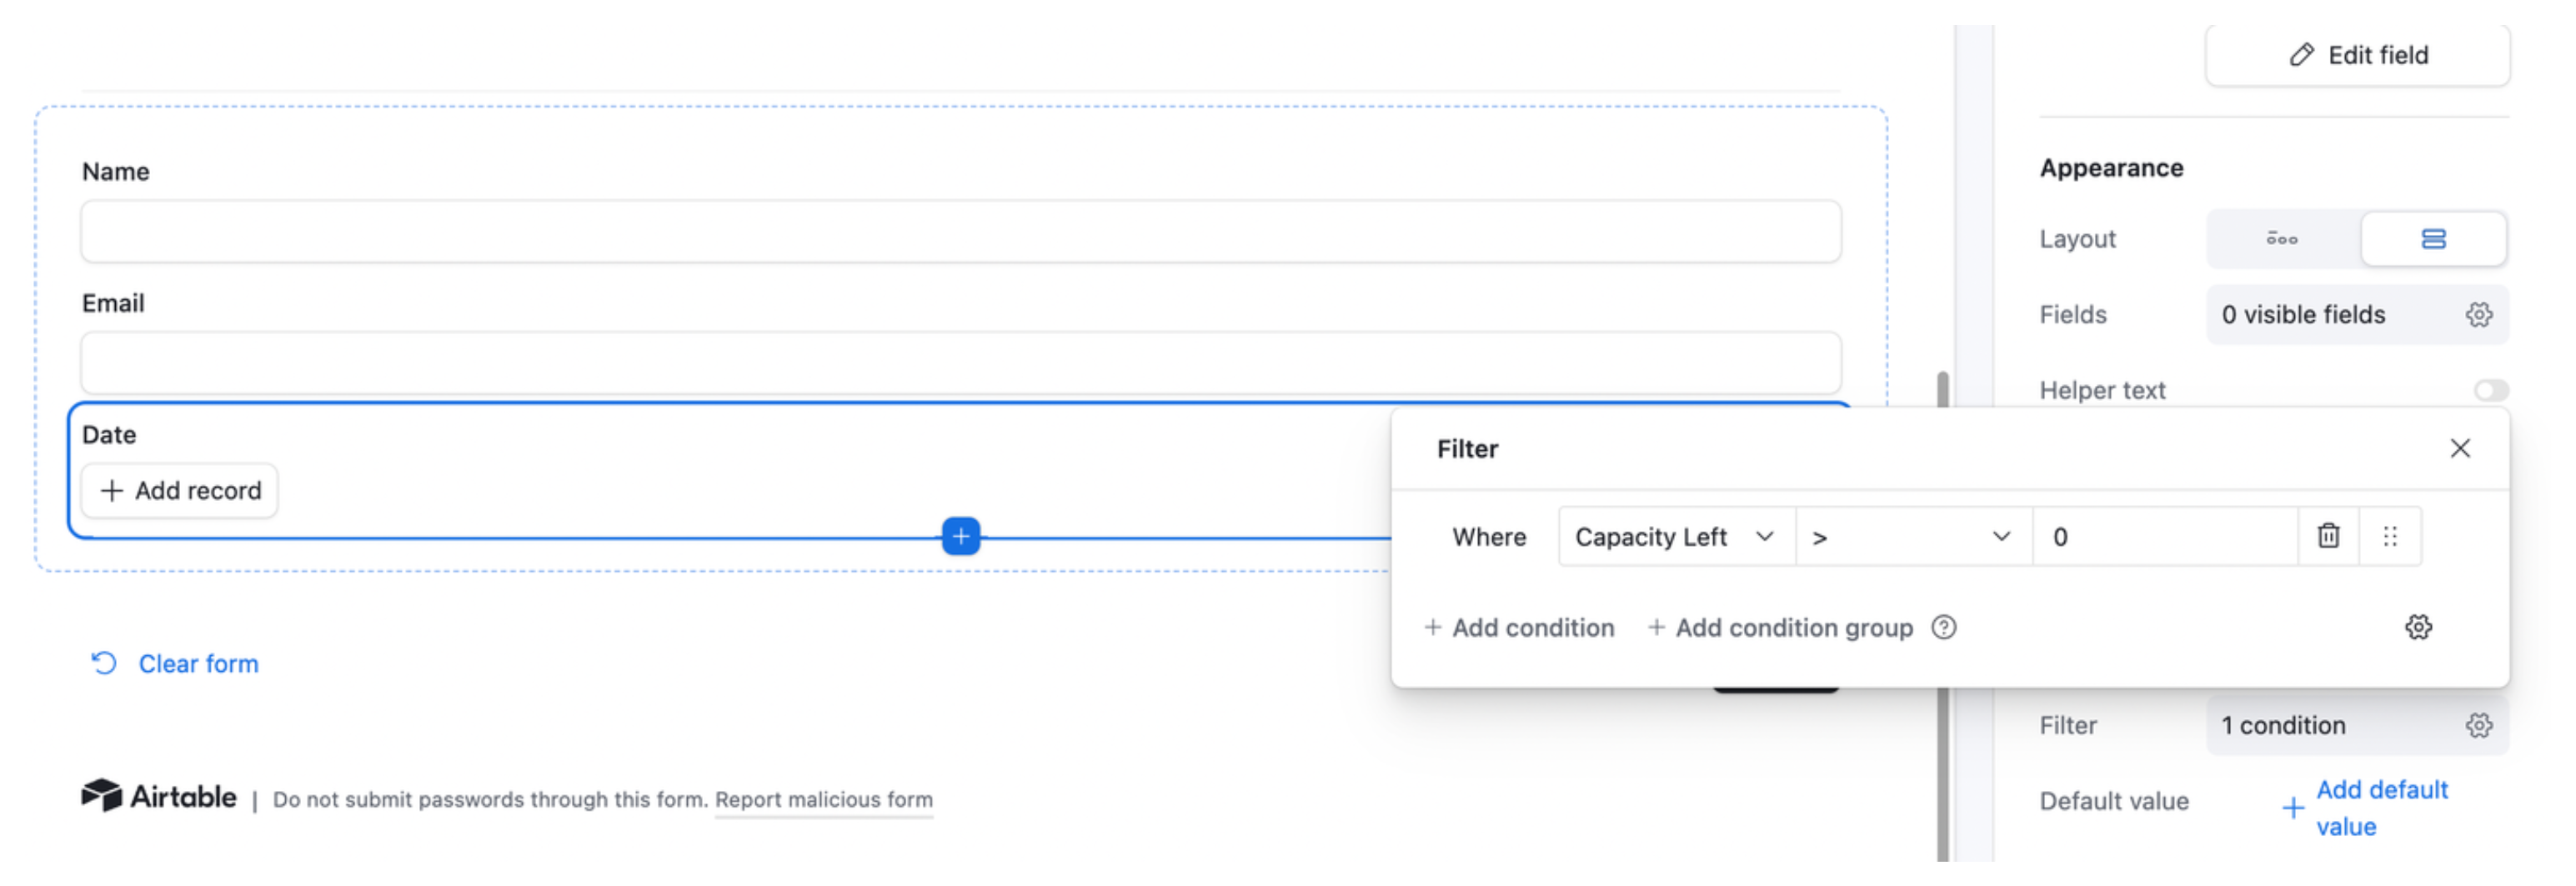
2. Filter out full dates
In the Rules section, find the Selection settings. Change the dropdown option from “All records” to “Specific records.” Then set a filter condition:
Where Capacity Left > 0
This ensures that only dates with available spots will appear in the form.
That’s it. Your form is now ready. You can share it with anyone, and participants will only see dates that still have open slots.
You can always add new dates or adjust the capacity directly in your Dates table whenever needed.
Limitations to Know About
This setup works well for most registration scenarios, but there are a few edge cases worth understanding before you go live.
The filter is not real-time. When someone opens the form, Airtable fetches the current list of available dates at that moment. If two people open the form at the same time and the last slot is available, both may see the date and both may attempt to register. Airtable does not lock slots during form filling. For low-traffic forms this is rarely a problem, but for high-demand events with very limited slots it can result in slight overbooking.
The form does not send confirmation emails. After submitting, participants receive no email confirmation. You can add this using an Airtable automation: trigger on form submission, then send an email to the registrant’s email field. See How to Send a Confirmation Email After an Airtable Form Submission for step-by-step instructions.
You cannot allow people to update their registration. Airtable native forms always create new records. If a participant wants to change their selected date, you need to handle that manually or use a different approach. See How to Update Existing Airtable Records with Forms for options.
Using Fillout for More Control
If you need more from your registration form, such as branded design, confirmation emails, waitlist logic, payment collection, or multi step flows, Fillout is worth considering.
Fillout connects directly to your Airtable base and writes responses to the same tables you have set up. You keep the same two-table structure described above and the capacity filter logic. But Fillout's form builder gives you:
-
Automatic confirmation emails to registrants on submission
-
A styled, branded form that looks professional
-
Conditional logic and multi-step flows
-
A waiting list feature for handling oversubscribed events
Fillout has a free plan that covers basic use cases. If you need the confirmation email feature specifically, see whether the native Airtable automation approach covers your needs first before adding a third-party tool.