How to Send Automated Follow-Up Emails in Airtable
Follow-up emails are one of the most impactful things you can automate in Airtable. Instead of manually tracking who you emailed and when, a scheduled automation checks every day, finds anyone who has not replied in 7 days, and sends the follow-up for you.
Here is the full setup: the table structure, the automation steps, how to handle multiple follow-up stages, and how to stop the sequence when someone replies.
Step 1: Set Up Your Table
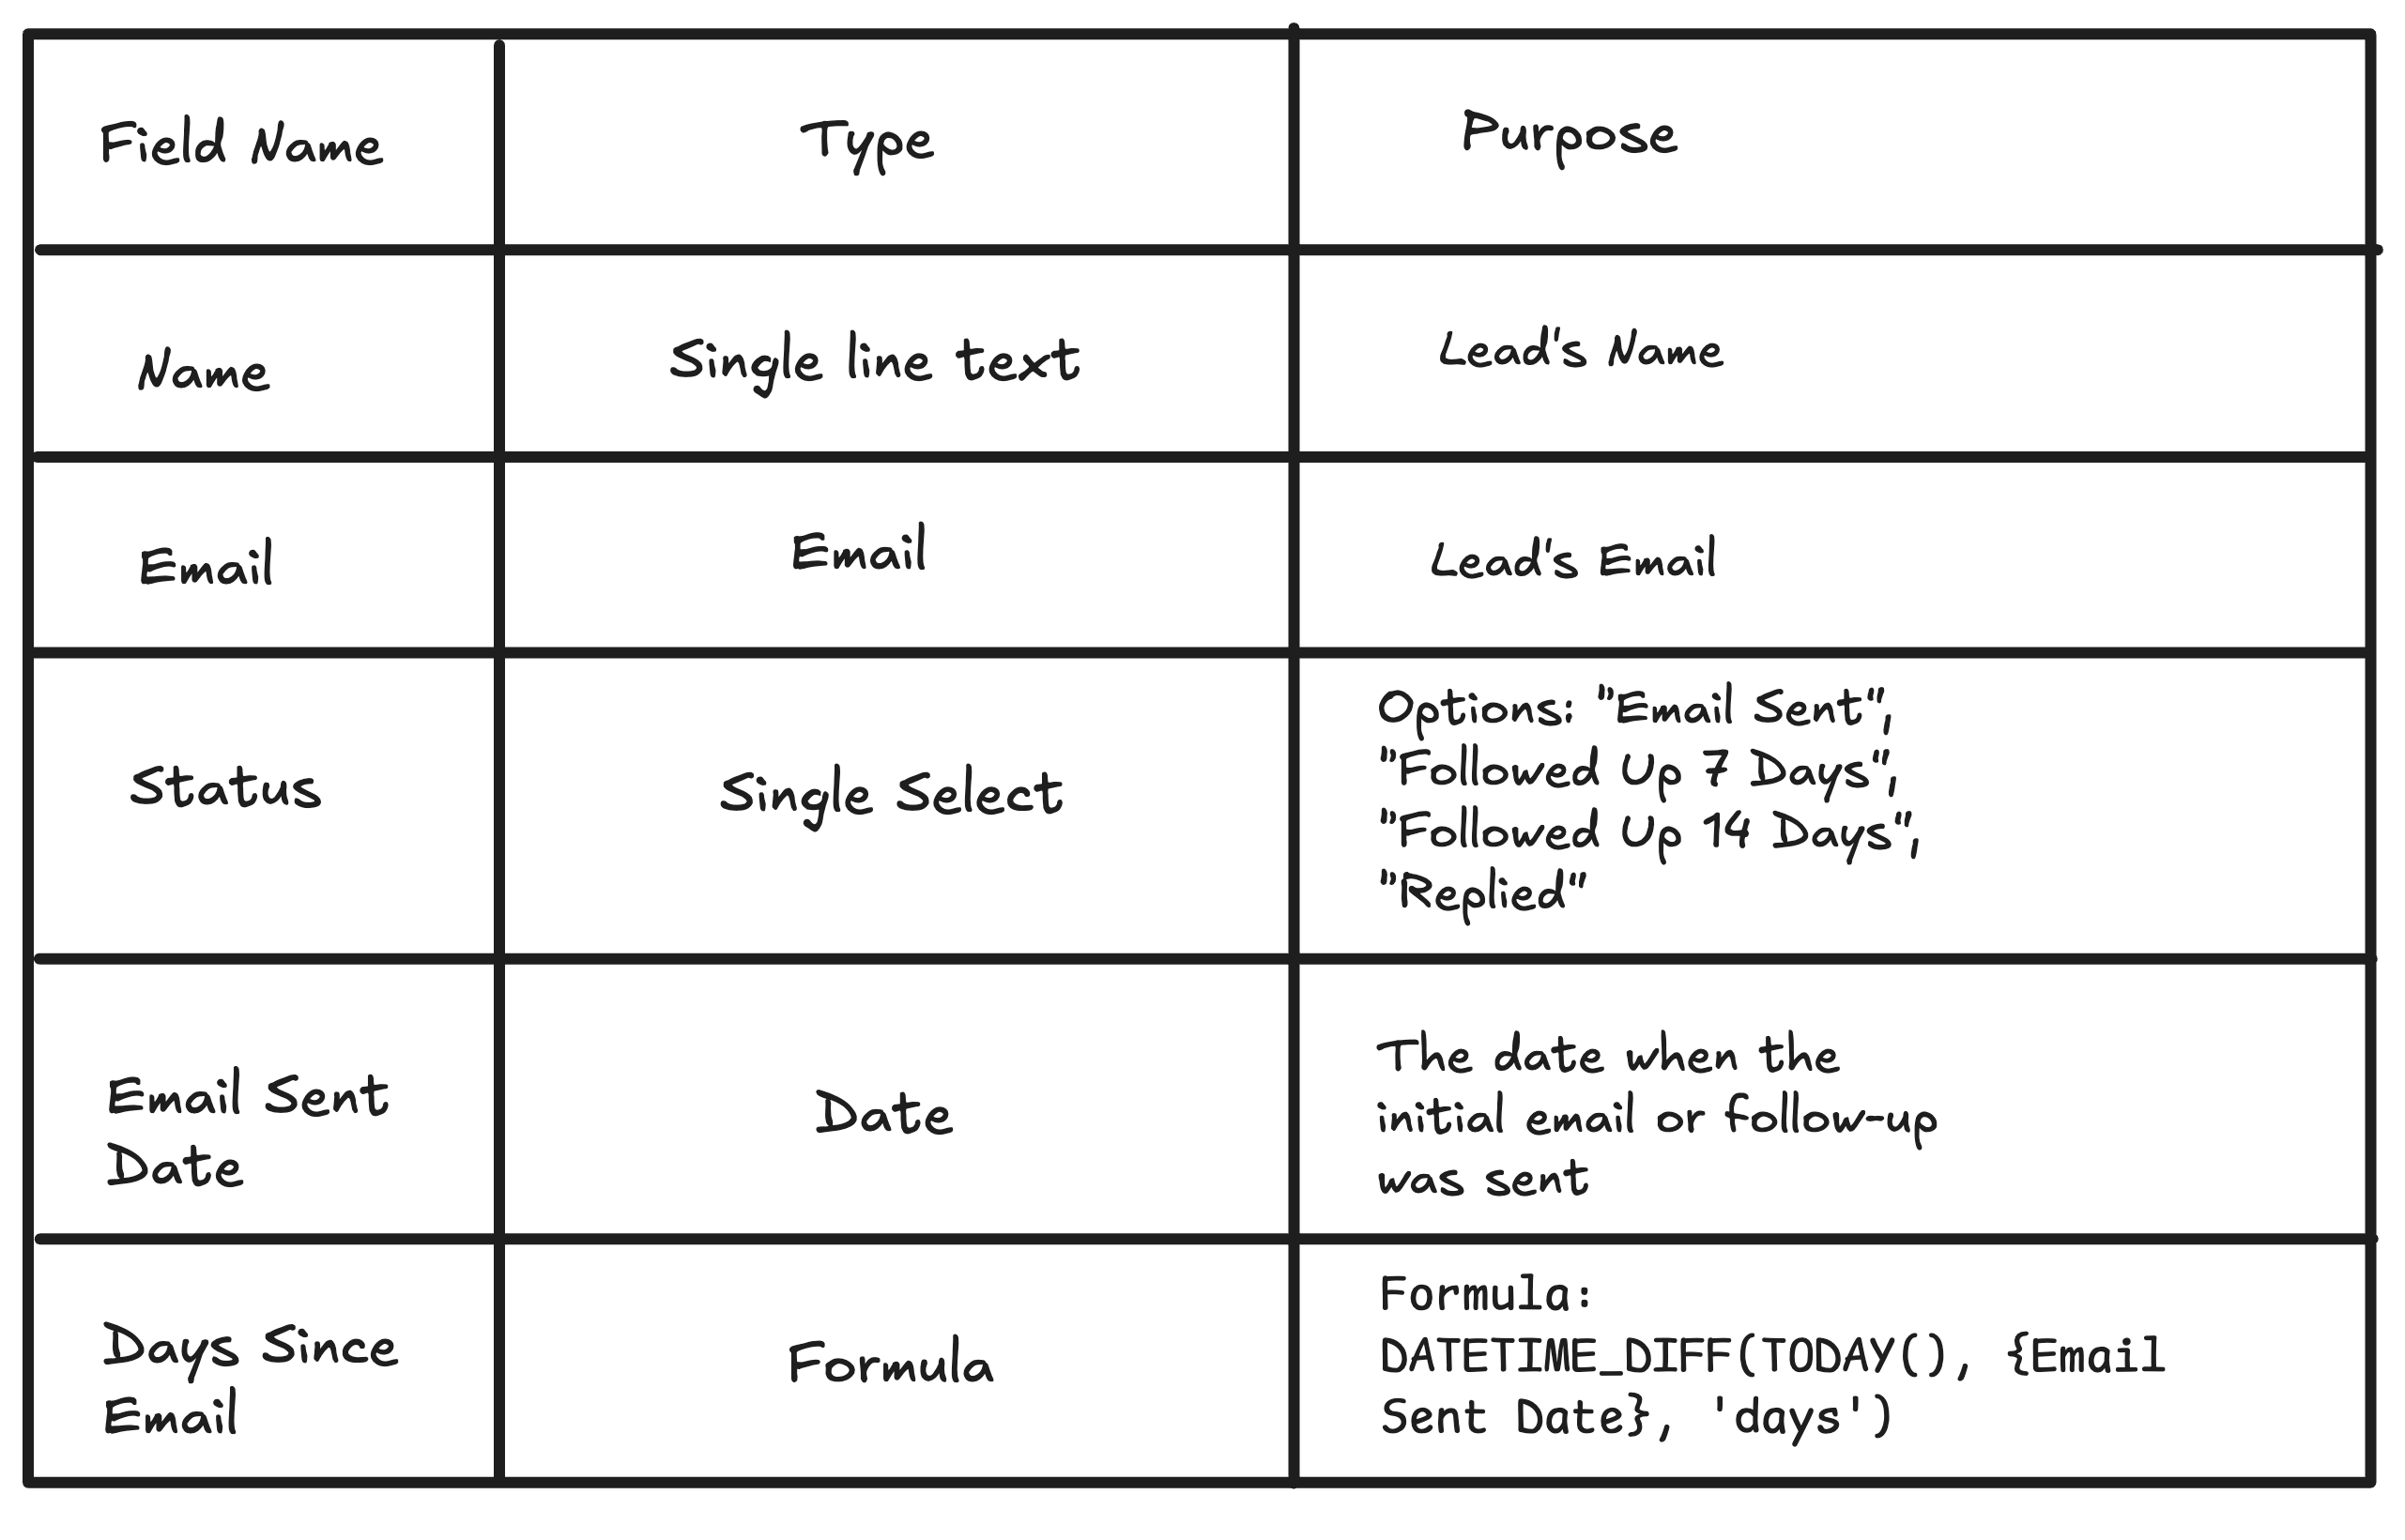
Your leads or contacts table needs these fields:
-
Name (single line text) - the contact's name
-
Email (email) - where the follow-up gets sent
-
Status (single select) - tracks where each lead is in the sequence. Options: Email Sent, Followed Up 7 Days, Followed Up 14 Days, Replied, Closed
-
Email Sent Date (date) - when you sent the initial email
-
Days Since Email (formula) - calculates how long ago you sent the email
For the Days Since Email formula:
DATETIME_DIFF(TODAY(), {Email Sent Date}, 'days')
This gives you a number you can filter on in the automation.
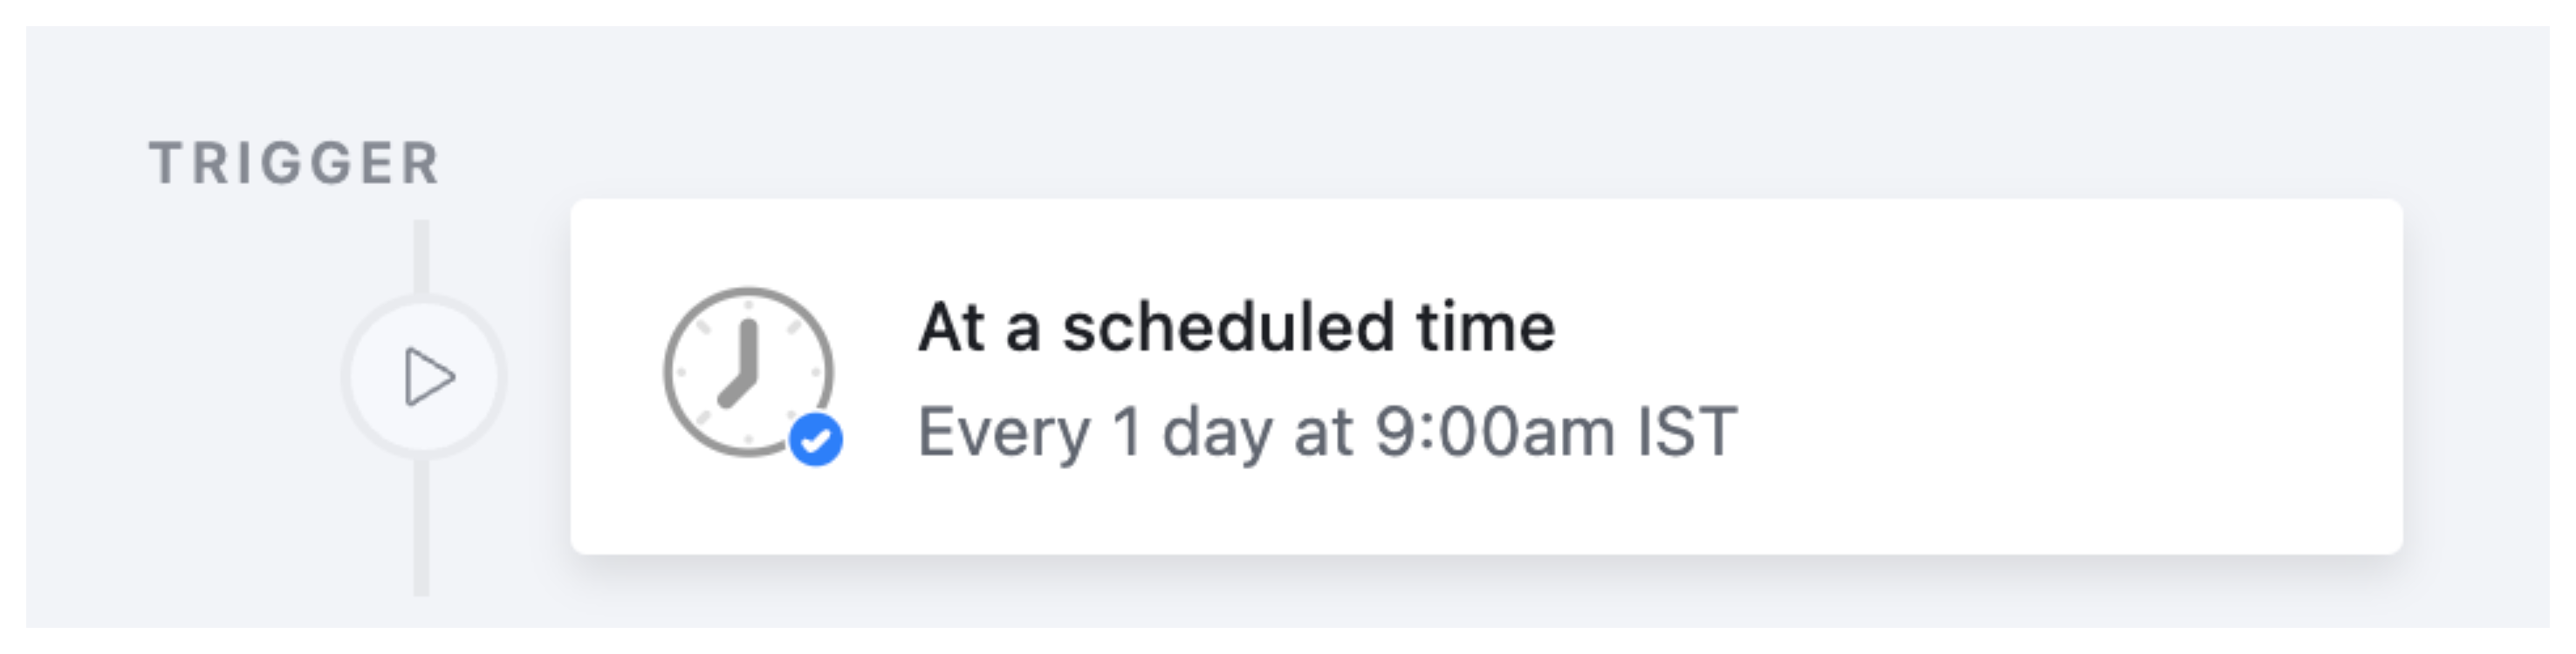
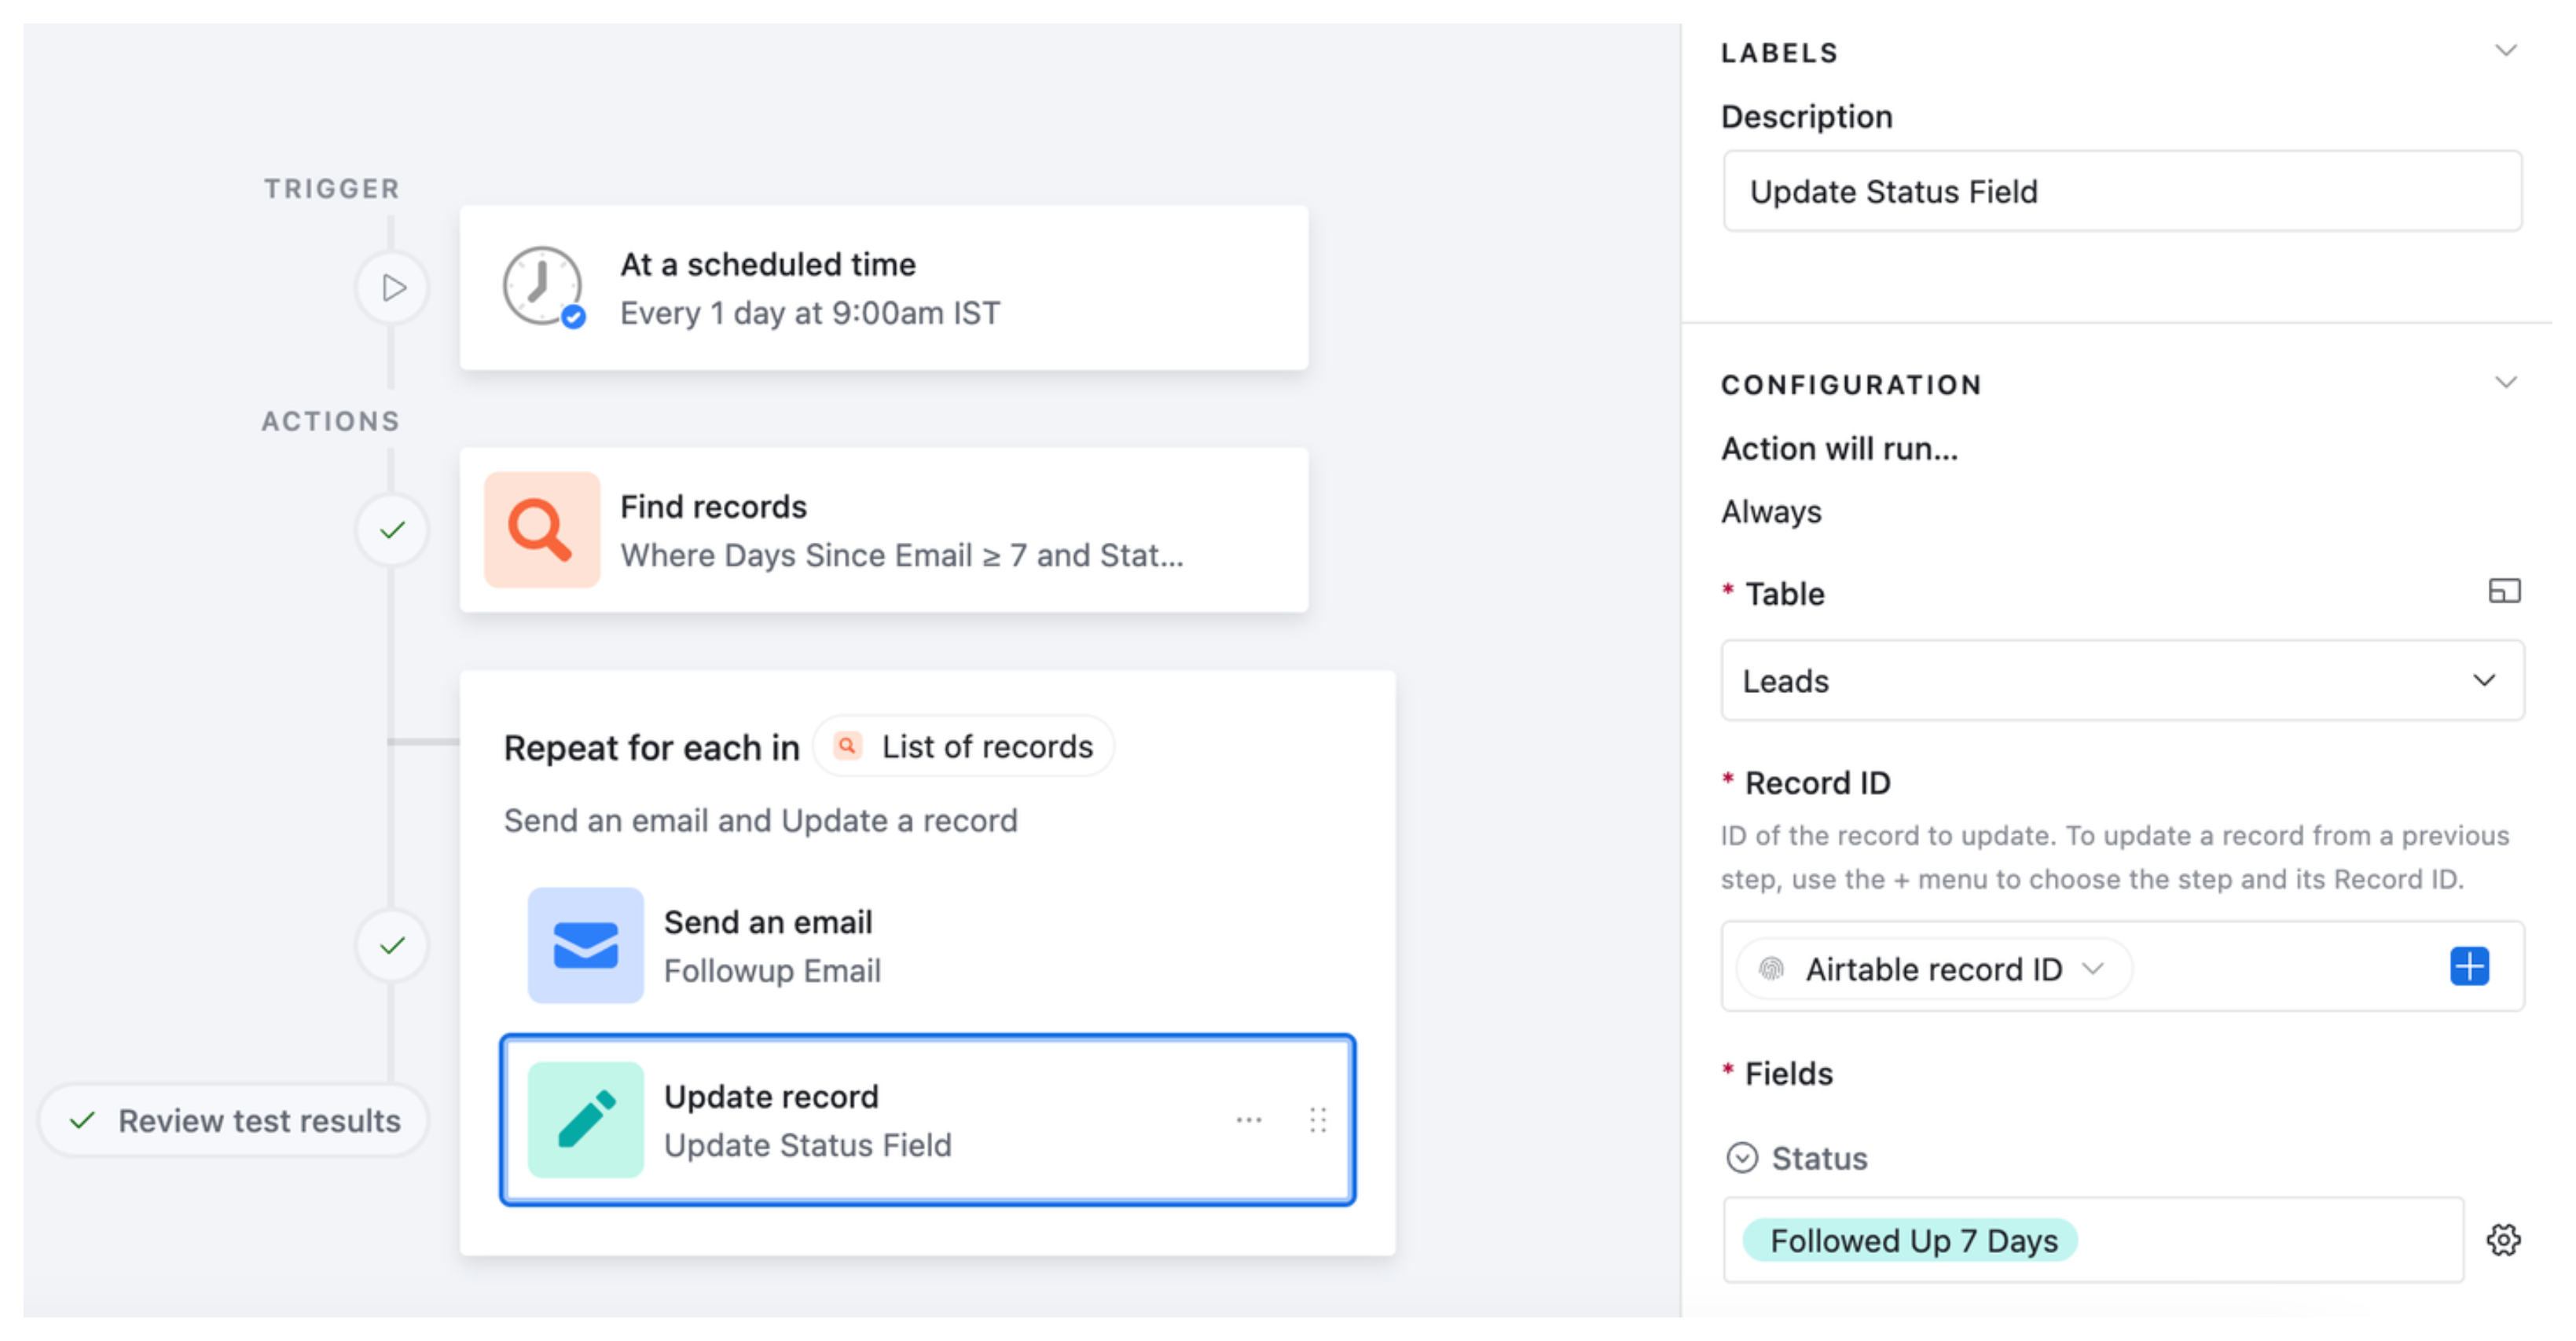
Step 2: Create the Automation Trigger
Create a new automation and choose At a scheduled time as the trigger.
Set it to run every day at 9 AM, or whichever time suits your workflow. This daily check is what makes the system reliable. Airtable looks for qualifying leads once per day rather than relying on you to remember to check manually.
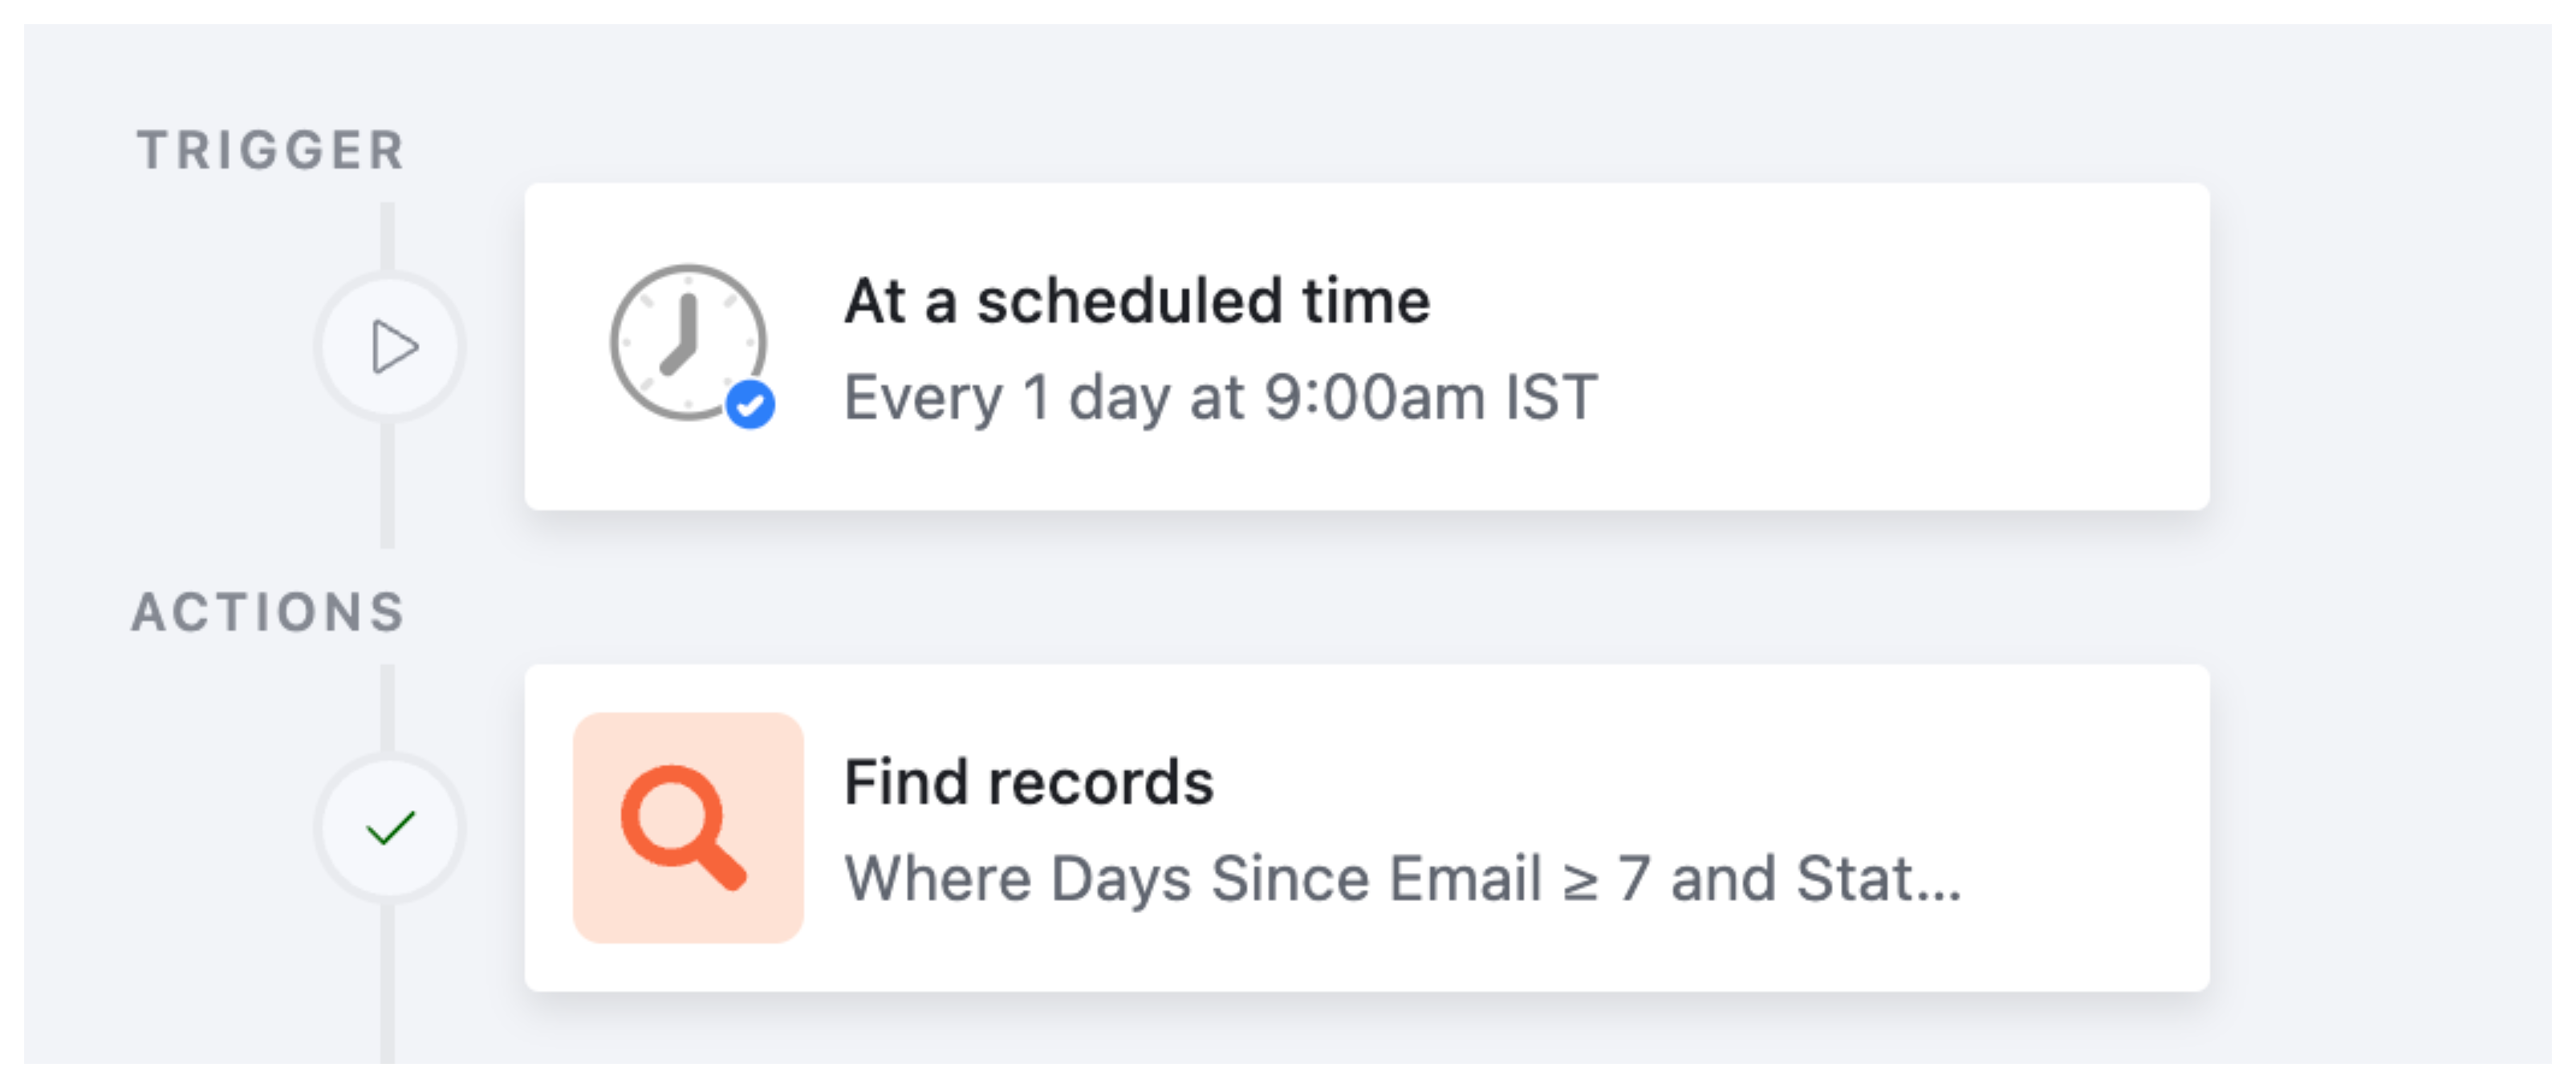
Step 3: Find Records That Need a Follow-Up
Add a Find records action. Select your leads table and add these two conditions:
-
Status is Email Sent
-
Days Since Email is greater than or equal to 7
This finds everyone who received your initial email but has not replied or been marked with any other status, and where at least 7 days have passed.
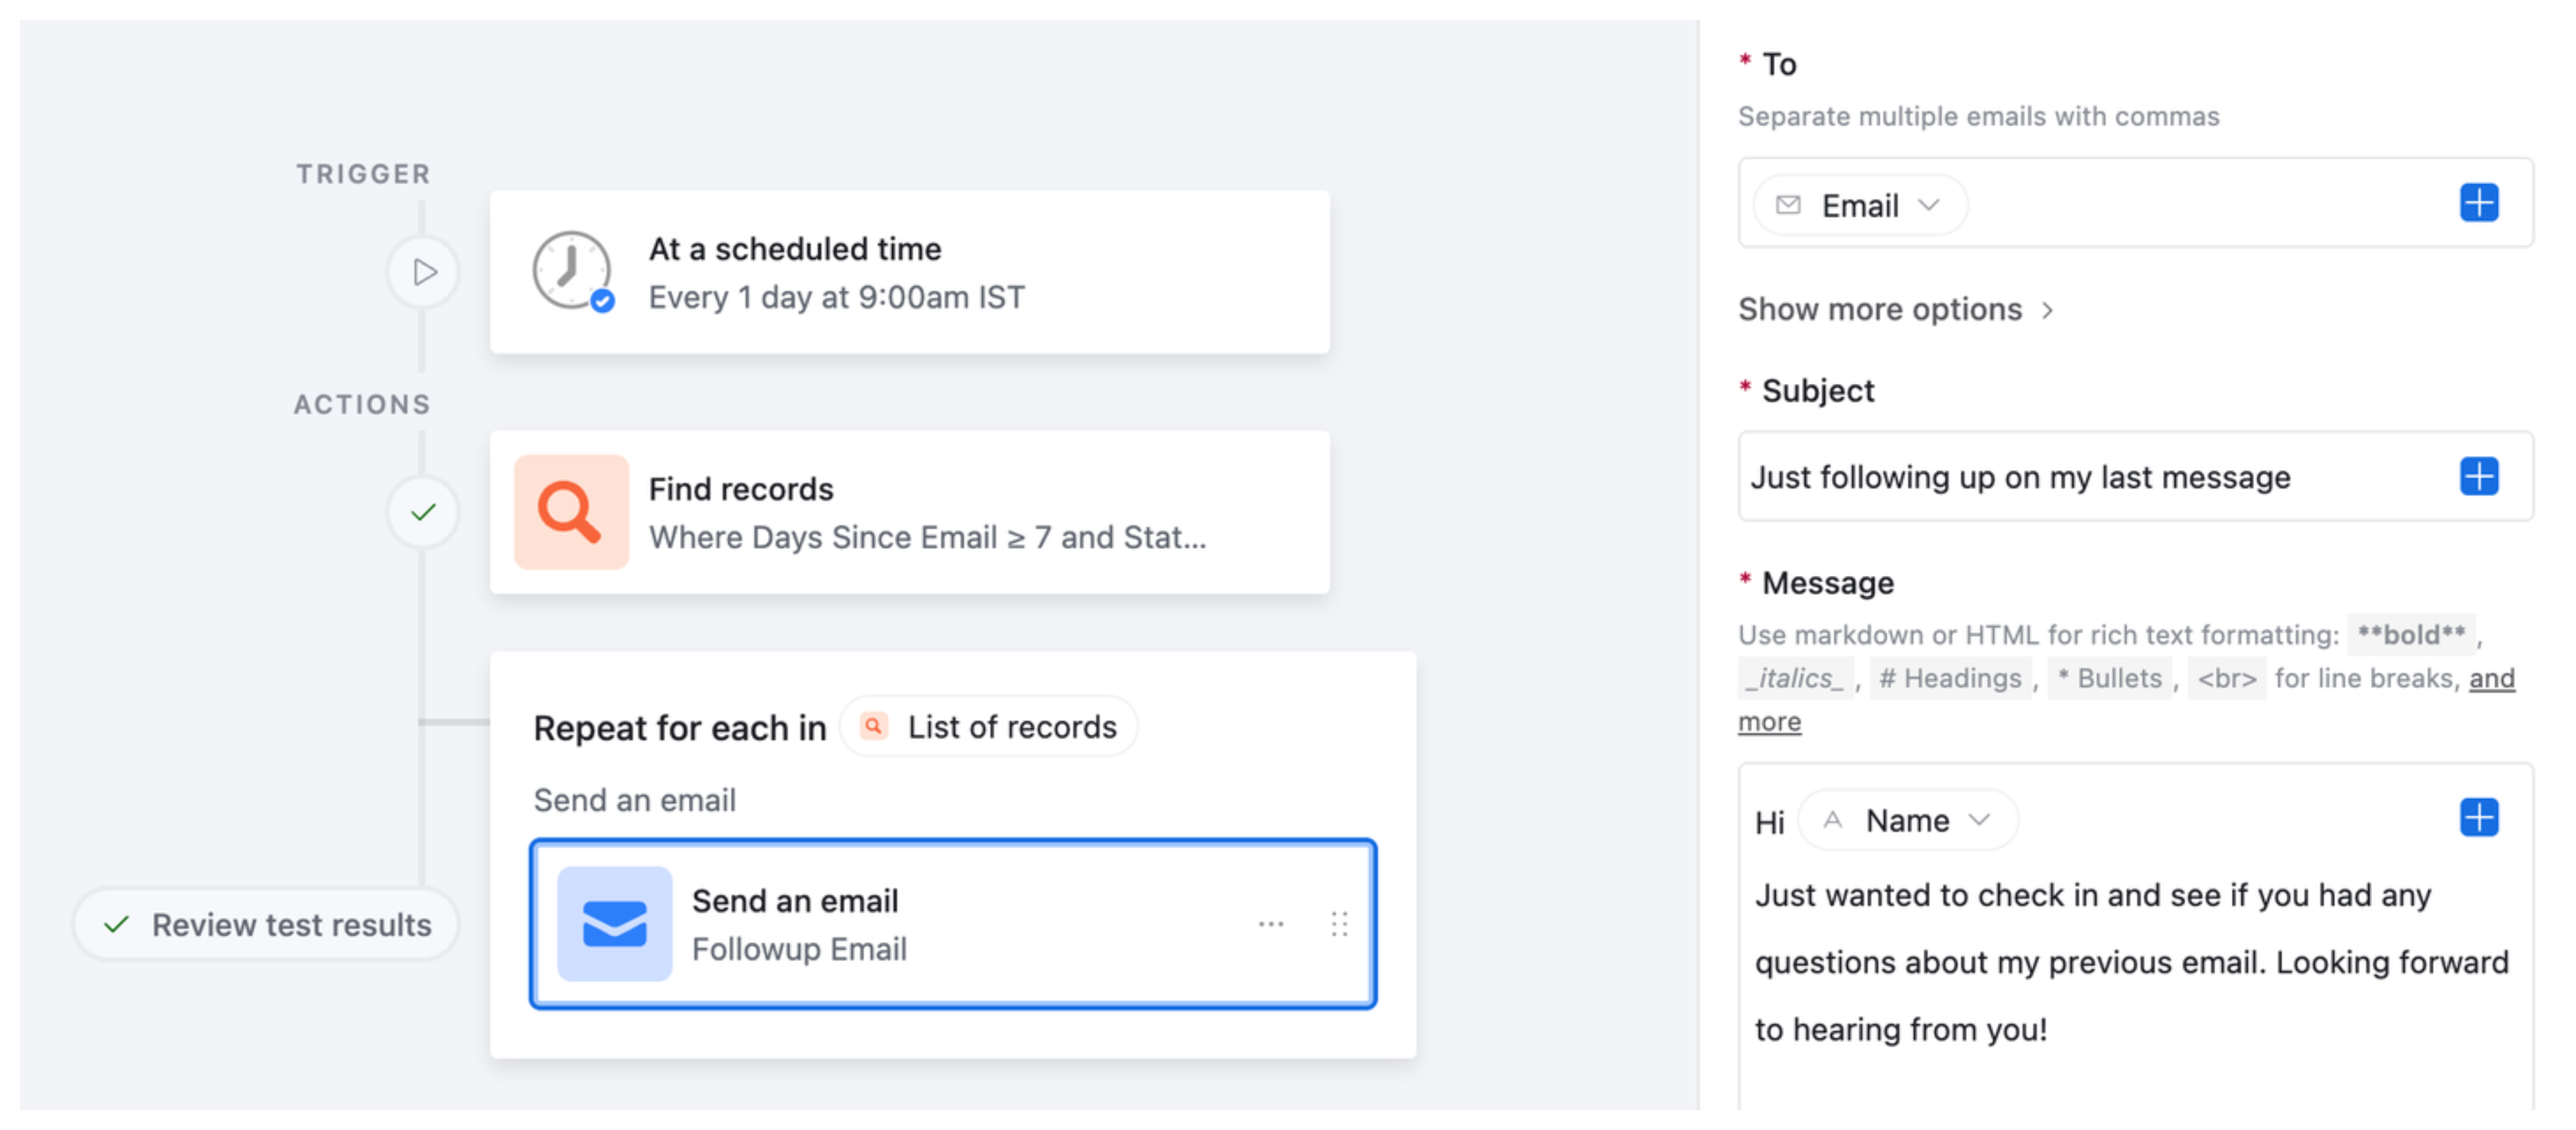
Step 4: Send the Follow-Up and Update the Status
Add a Repeating group to loop through every record found in the previous step. Inside the repeating group, add two actions:
Action 1 - Send email
Set the recipient to the Email field from the found record. Write a short, natural follow-up subject and body. Use the field picker to pull in the contact's name dynamically.
Example:
- Subject:
Following up on my last message - Body:
Hi {Name}, just checking in to see if you had a chance to look at my previous email. Happy to answer any questions if helpful.
Action 2 - Update the record status
Update the same record's Status field to Followed Up 7 Days. This is critical. Without this update, the automation will find the same records again tomorrow and send another follow up.
Adding a Second Follow-Up at 14 Days
Airtable only allows one repeating group per automation. To add a second follow-up stage, create a separate automation.
The second automation is identical in structure, with different conditions in the Find records step:
-
Status is Followed Up 7 Days
-
Days Since Email is greater than or equal to 14
And the update action sets Status to Followed Up 14 Days.
You can keep adding stages this way, such as 21 days or 30 days, each as its own automation with progressively more specific status conditions.
Keep the follow-up copy fresh for each stage. A third touch-point that reads identically to the first is easy for recipients to recognise and ignore.
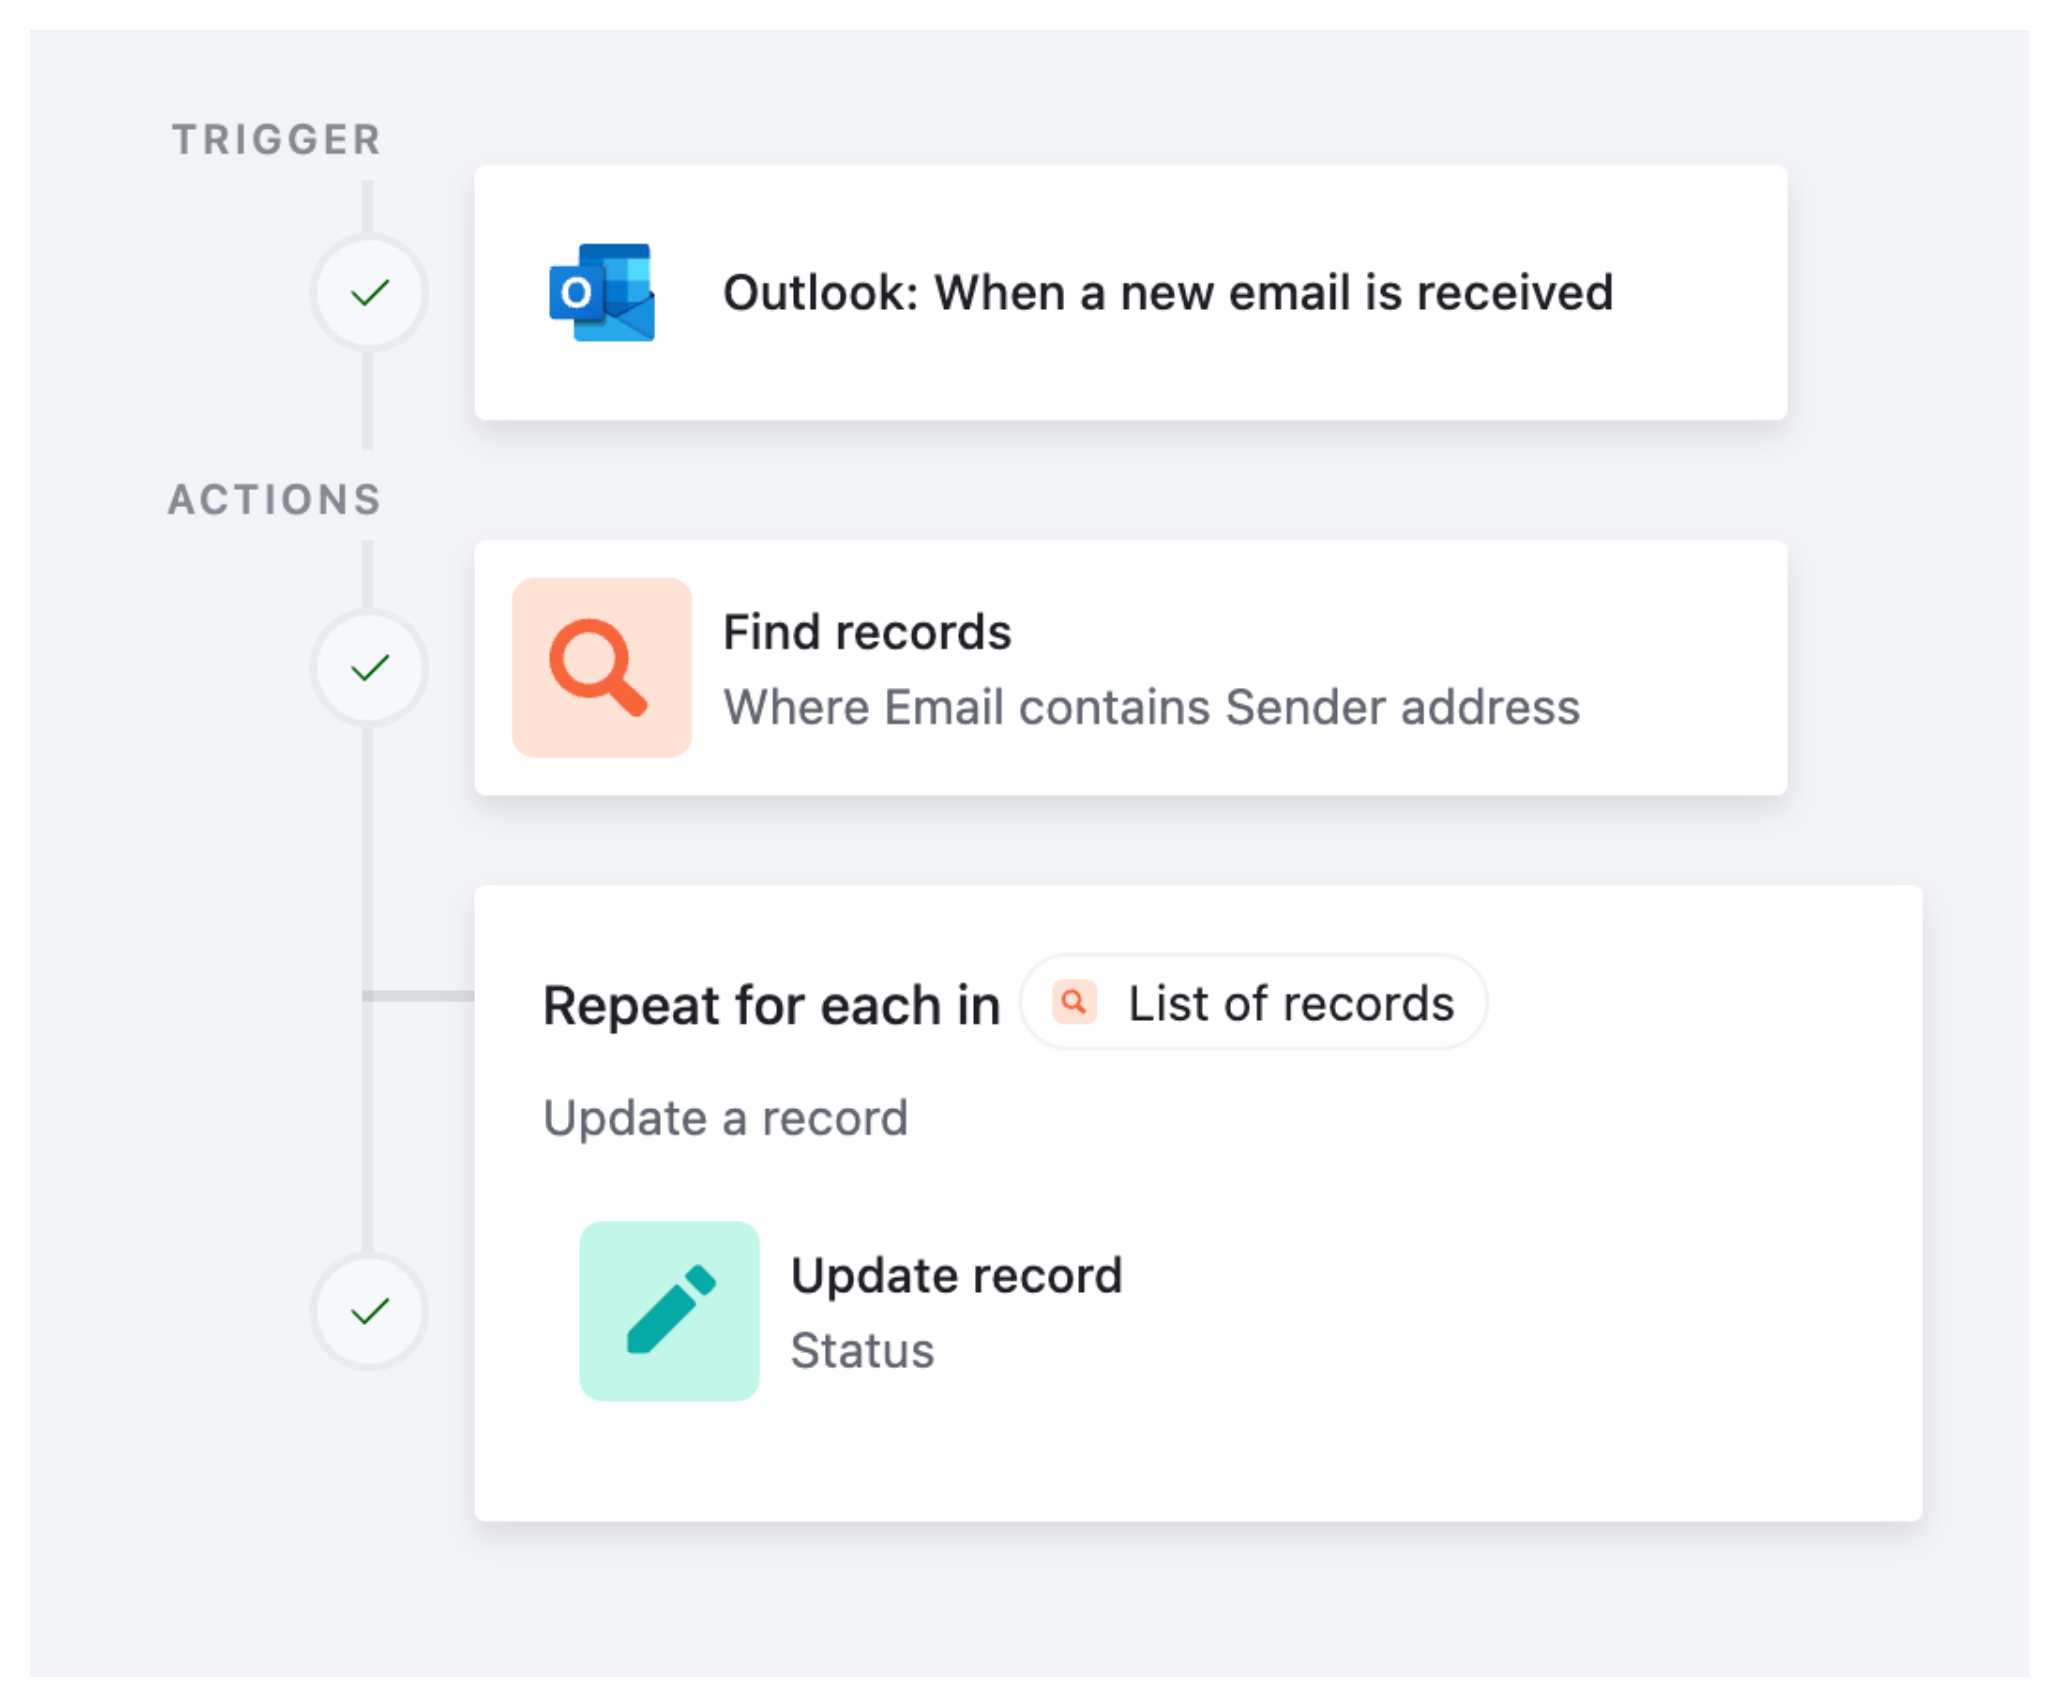
Step 5: Stop the Sequence When Someone Replies
Sending a follow-up to someone who already replied is awkward and undermines trust in your process. Here is how to detect replies and update the status automatically.
If you use Outlook
Airtable has a built-in When email is received trigger for Outlook:
-
Create a new automation with the When email is received trigger
-
Select the Outlook folder to monitor (your Inbox or a dedicated folder)
-
Add a Find records action to search your leads table for a record where the Email field matches the sender's email address
-
Add a Repeating group to loop through any matching records
-
Inside the group, add an Update record action to set Status to Replied
If you use Gmail or another email provider
Airtable does not have a native Gmail trigger for incoming emails. The workaround uses Airtable's generic email trigger, available on Business and Enterprise Scale plans:
-
Create an automation with the When email is received trigger - Airtable provides a unique email address
-
In Gmail, set up a filter to auto-forward replies from your leads to that Airtable email address
-
The automation receives the forwarded email, uses Find records to locate the matching lead, and updates their Status to Replied
Alternatively, use Make to watch your Gmail for replies and update Airtable automatically. Make has a Gmail module that can search for emails matching specific criteria and trigger Airtable record updates.
Keeping Your Automation Quota in Check
A daily automation that processes hundreds of leads can consume a significant portion of your monthly automation run quota. If you have a large list, monitor your usage in your workspace settings and consider:
-
Running the automation every two days instead of daily for later-stage follow-ups
-
Adding a cap on how many records the Find records step returns at once
For more on managing your automation run quota, see How to Limit Automation Runs in Airtable to Avoid Running Out of Quota.
If you are also sending an initial confirmation email when someone first enters your system, see How to Send a Confirmation Email After an Airtable Form Submission for how to set that up alongside this follow-up sequence.